After successfully implementing the ingestion, preprocessing, exploratory data analysis (EDA), and feature engineering stages, the process advances. It moves to the next step.
Now, the focus shifts towards automation and continuous monitoring. Automation ensures that every transformation and analytical job executes consistently. These jobs are repeatable. Monitoring provides visibility into system health and performance through real-time metrics.
Together, these two elements form the DataOps layer of the solution. This layer introduces reliability, transparency, and operational consistency across the entire pipeline. Orchestration acts as the backbone of this layer. It ensures that each stage executes in the correct order. It also ensures they run under defined conditions. With this in place, your ETL, EDA, and feature engineering stages evolve from standalone jobs. They become a cohesive, automated workflow. This workflow is a system that runs confidently and predictably, day after day.
The Goal: Making Your Data Pipeline Work as One
Once our ETL, EDA, and feature engineering jobs were in place, a natural question followed. How do we make them run reliably every time? We didn’t just want these stages to work. We wanted them to work consistently and automatically. We needed complete visibility into every step. That’s exactly what this stage is about.
By introducing orchestration, we aim to ensure that each transformation happens in the correct order and without errors. This is how we build reliability into the process. We ensure that every dataset is cleaned. It is analysed and enriched exactly as intended. With proper monitoring, we’ll be able to track performance, catch issues early, and understand how the pipeline behaves over time.
In essence, this stage is about turning our independent Glue jobs into a cohesive, automated workflow. It’s about building a system that runs confidently and predictably. It operates day after day. There is no need for constant manual control.
Creating Glue Workflow
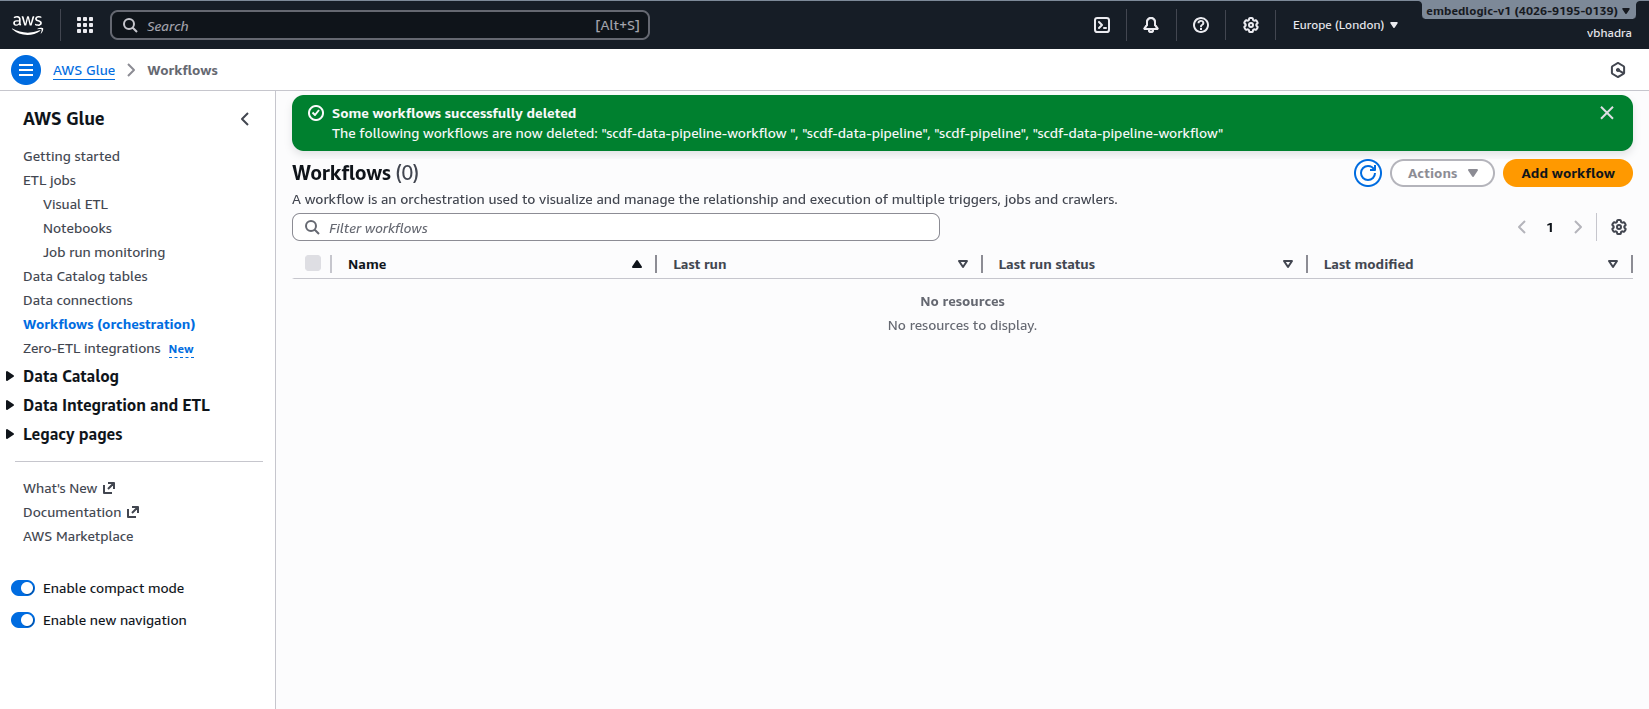
To create an AWS Workflow go to the AWS Glue Service and click on Workflow (orchestration).
Click on the Add Workflow button located at the top right corner of the page. Fill in the following details for the workflow:
Name: scdf-data-pipeline-workflow
Description: AWS Glue workflow orchestration for data pipeline automation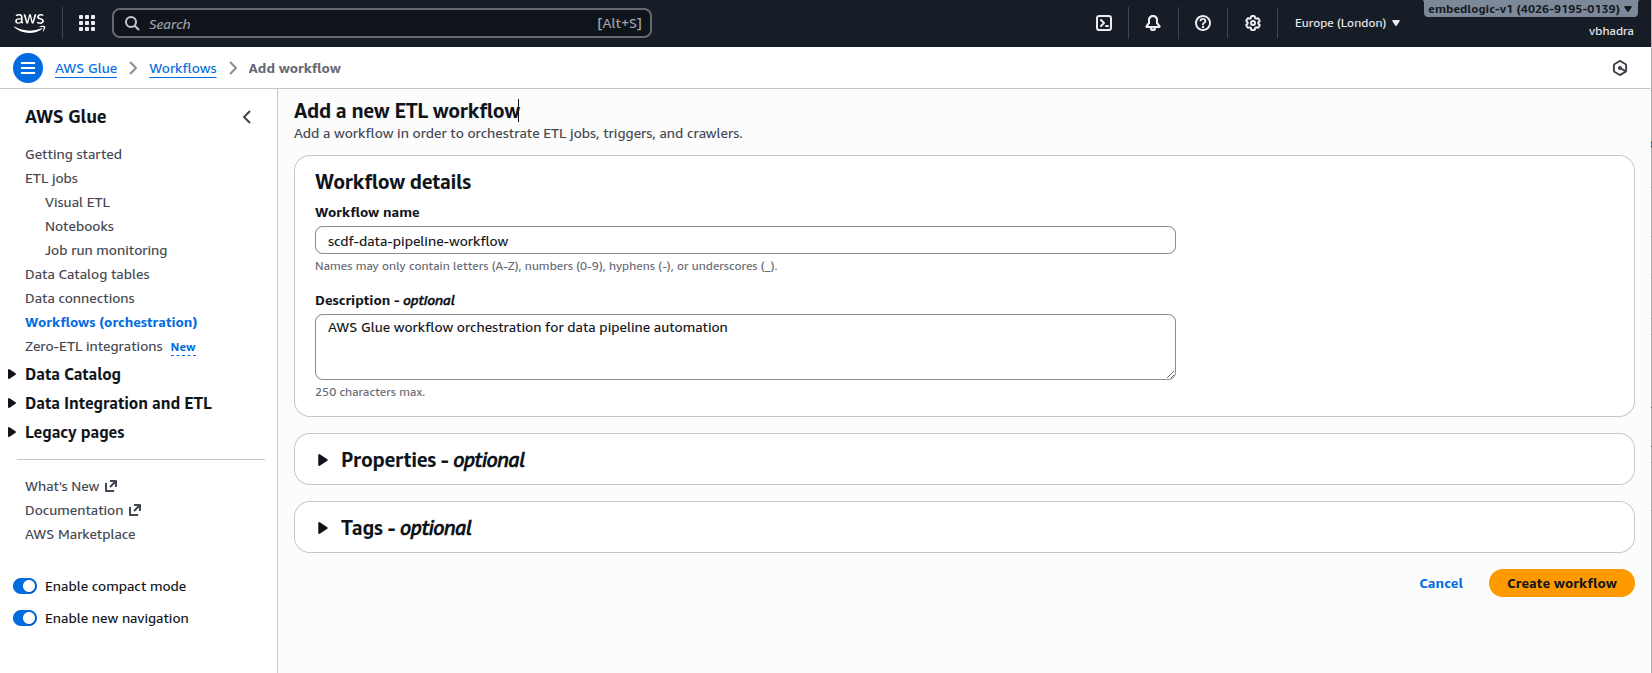
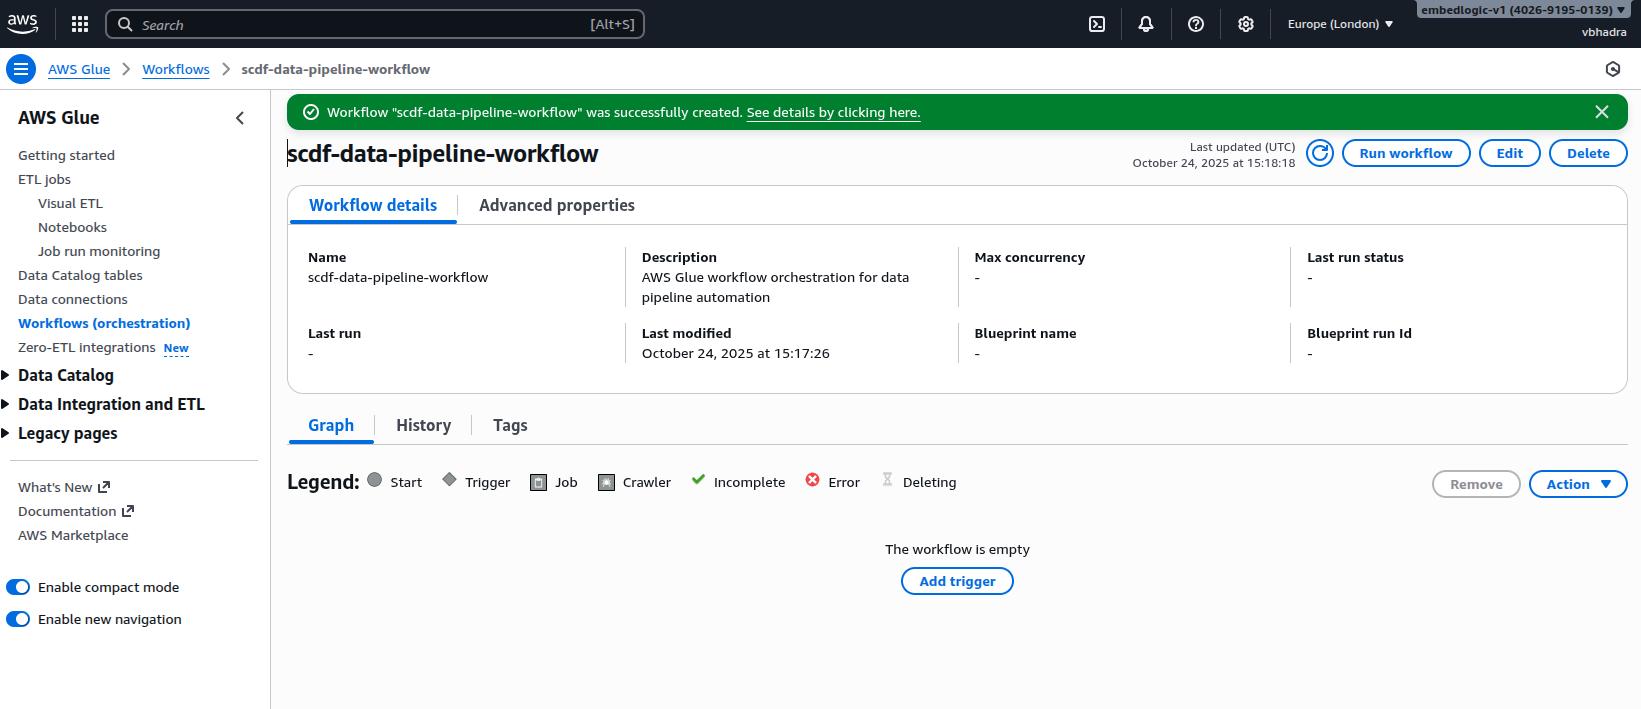
Click on the Create Workflow button at the bottom right corner. A new workflow named scdf-data-pipeline-workflow will be created for you:

Once created, the workflow appears in our orchestration list. However, a workflow is only as effective as its triggers — and that’s what we configured next.
Setting Up Triggers for Sequential Execution
Click on the workflow to go to its detail page:
Once created, the workflow appears in our orchestration list. However, a workflow is only as effective as its triggers — and that’s what we set up next.age:

A pop-up screen will appear, giving you the option to choose an existing trigger or create a new one. For our purposes, we’ll create a new trigger. Click on Add New and fill in the following details for the trigger:
Trigger Name: Trigger_01_split_and_clean
Description: Trigger for actuating the split Glue job
Trigger Type: On demand
Click on the Add button at the bottom, and you should see that the trigger has been created.

Next, we need to attach a Glue job to the trigger. This first trigger will initiate the first Glue job in our pipeline, scdf-etl-clean-split-job. Click on Add Node and select scdf-etl-clean-split-job from the list.
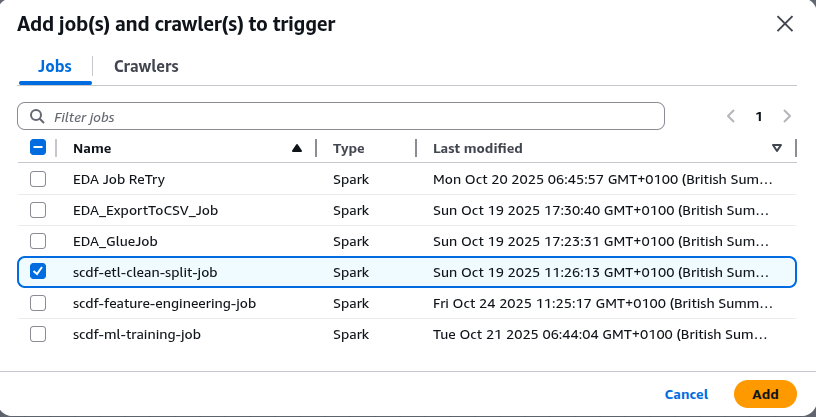
Click on Add to add the job.

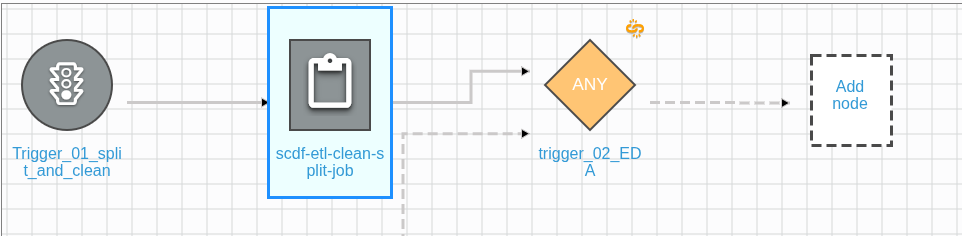
Click on scdf-etl-clean-split-job, and it will expand, prompting you to attach the next trigger in the pipeline.

Next, we need to create another trigger for the EDA Glue job. Click on Add Trigger, as shown in the diagram.
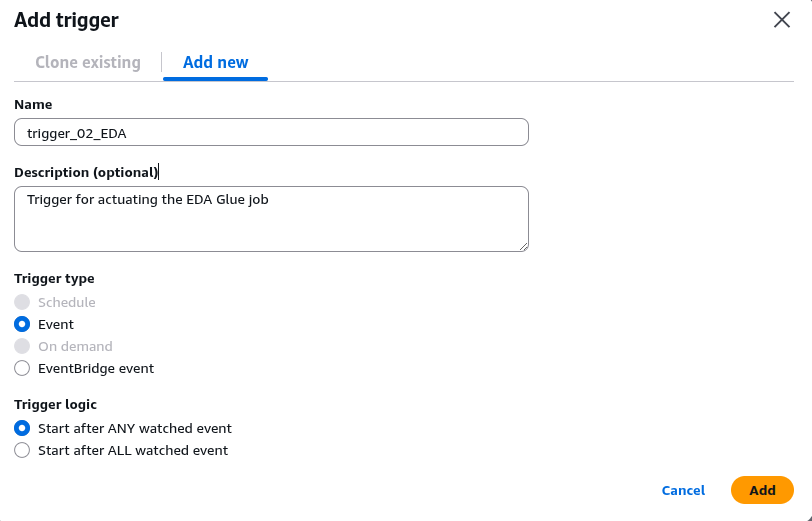
Fill in the following details about the trigger:
Trigger Name: trigger_02_EDA
Description: Trigger for actuating the EDA Glue job
Trigger Type: Event
Trigger Logic: Start after ANY watched event
Click on Add to add the trigger.
As you can see, the trigger is pointing to another possible node or job. Click on Add Node to attach our EDA job to the trigger:
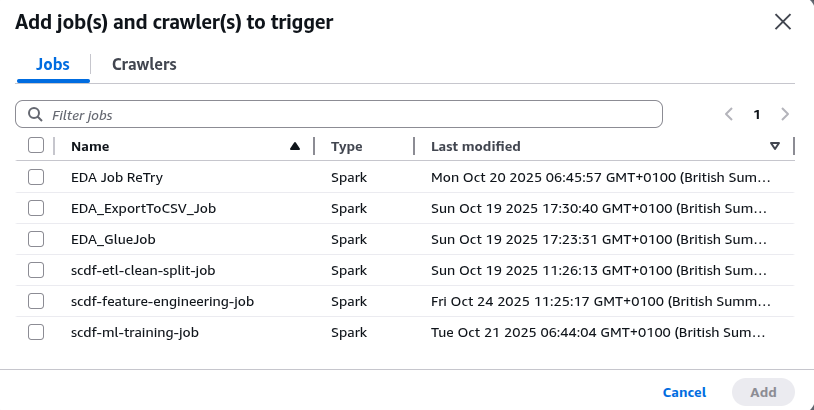
Select EDA Job Retry (the name of the EDA Glue job):

Click on Add to attach the job to the trigger:

We have one more trigger to create for the feature engineering Glue job. Click on the EDA Job Retry button, and it will expand, prompting you to add the next trigger:
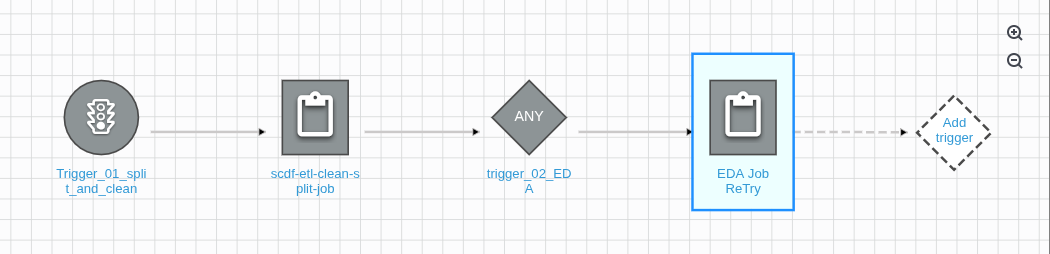
Click on the Add trigger add one more trigger:

Fill in the following details about the trigger:
Trigger Name: trigger_03_Feature_Engineering
Description: Trigger for actuating the feature engineering Glue job
Trigger Type: Event
Trigger Logic: Start after ANY watched event
Click on the Add button to create the trigger.

Notice that the trigger is pointing to the job to be attached. Click on the Add Node button and select scdf-feature-engineering from the list:
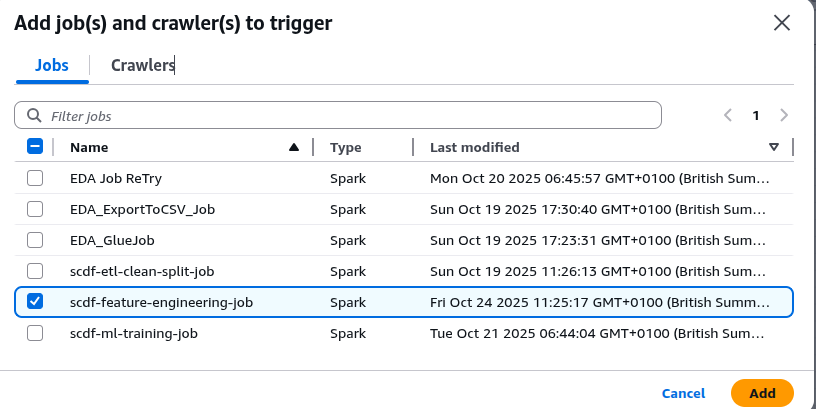
Click on Add button to add the job:

Now we have all the necessary triggers and their associated Glue jobs in the workflow. We are ready to run the workflow to verify that it is functioning correctly.
Testing and Verifying the Workflow
Before letting automation take over, it was essential to test the workflow manually. From the workflow dashboard, we clicked Run Workflow, watched it start, and monitored its execution in real time.

Once you click on Run Workflow, a notification will appear indicating that the workflow has started:
Workflow successfully starting
The following workflow is now starting: “scdf-data-pipeline-workflow”
Monitoring the workflow progress
To monitor the progress of individual Glue jobs, go to the left-hand panel and click on Job Run Monitoring:

On the right-hand panel, you’ll see each running or in-progress Glue job along with its status. In our case, the scdf-etl-clean-split-job has completed, while the EDA Job Retry job is currently running. Wait for all the jobs to finish. Once they do, you’ll see the Completed status displayed on the workflow detail page:

Also verify from the Job Run Monitoring page that all the jobs have succeeded:

Every job was completed successfully. This includes tasks from data cleaning and splitting to feature engineering. These successes confirm that our workflow logic is sound.
Validating Logs in CloudWatch
Before moving on to orchestration, it was crucial to verify that each stage of the pipeline executed successfully. The CloudWatch logs provided clear confirmation. All three Glue jobs (preprocessing, EDA, and feature engineering) completed without errors. They produced the expected outputs.
Preprocessing Job
The first Glue job started at 15:47:12, confirming the detected column schema and basic statistics. The job ran through type detection, cleaning, and validation steps smoothly. The logs show that all four columns were correctly identified as strings. A total of 913,000 records were processed without missing values.
2025-10-24T15:47:12.419Z
---- Column Data Types ----
date: string
store: string
item: string
sales: string

2025-10-24T15:47:36.346Z
{'date': 0, 'store': 0, 'item': 0, 'sales': 0}
Row count after cleaning and normalisation: 913000
2025-10-24T15:47:53.491Z
Processed data written to: s3://scdf-project-data/processed/
2025-10-24T15:48:16.741Z
Train/Test split written to: s3://scdf-project-data/training/
Glue job completed successfully at: 2025-10-24 15:48:16.741721
These traces confirm that the raw dataset was cleaned, validated, and split successfully. This process was done into training and test subsets. It sets the stage for exploratory analysis.
Exploratory Data Analysis (EDA) Job
The second job began at 15:49:36, loading the preprocessed dataset from S3 and verifying the schema conversion. The EDA phase produced multiple analytical summaries. These included descriptive statistics, temporal breakdowns, and correlations. All of these analyses ran without interruption.
2025-10-24T15:49:36.438Z
---- Starting Exploratory Data Analysis (EDA) ----
Loading preprocessed dataset from: s3://scdf-project-data/processed/

2025-10-24T15:49:49.284Z
root
 |-- date: date (nullable = true)
 |-- store: integer (nullable = true)
 |-- item: integer (nullable = true)
 |-- sales: float (nullable = true)
 |-- sales_scaled_value: float (nullable = true)

2025-10-24T15:50:10.151Z
+-----+------------------+
|store|         avg_sales|
+-----+------------------+
|    2| 67.03 |
|    8| 64.14 |
|    3| 59.53 |
...

2025-10-24T15:50:19.080Z
Missing Values Summary:
{'date': 0, 'store': 0, 'item': 0, 'sales': 0, 'sales_scaled_value': 0}

2025-10-24T15:50:21.598Z
Correlation between store and item: 7.32e-16
Correlation between item and sales: -0.0559

2025-10-24T15:50:28.870Z
EDA summary outputs written to: s3://scdf-project-data/eda/
EDA job completed successfully at: 2025-10-24 15:50:28.871836
From the summary, we can see that data integrity checks, aggregations, and correlation analysis all executed as expected. The outputs were written to S3, confirming a successful and complete EDA run.
Feature Engineering Job
The third job started at 15:52:16, focusing on creating temporal and lag-based features for model training. The log shows each transformation executed in sequence, including lag and rolling average computation, missing-value imputation, and output export.
2025-10-24T15:52:16.903Z
Processed dataset loaded successfully.
2025-10-24T15:52:17.120Z
Temporal features (year, month, day_of_week) created.
2025-10-24T15:52:17.316Z
Lag and rolling average features created.
2025-10-24T15:52:17.389Z
Missing values in lag features imputed with zeros.
2025-10-24T15:52:33.207Z
Feature-engineered dataset written to: s3://scdf-project-data/features/
Feature engineering job completed successfully at: 2025-10-24 15:52:33.212738
These logs confirm that the dataset was enriched with temporal and statistical features. It was written successfully to S3. The process completed without errors.
Verification Summary
Each job concluded with the line “Running autoDebugger shutdown hook”, indicating graceful shutdowns and no unhandled exceptions. These traces validate that all three Glue jobs executed sequentially and correctly. The jobs are preprocessing, EDA, and feature engineering. They produced clean, verified outputs at every stage. This end-to-end validation provides a solid foundation for automating the entire workflow using AWS Glue Workflows.
Conclusion
In conclusion, we have successfully crafted a robust data pipeline. It is both operational and efficient. This is thanks to the integration of AWS Glue Workflows. We meticulously orchestrated the process. Our ETL, EDA, and feature engineering stages are interconnected. This connection fosters a smooth and reliable data process. Our thorough testing has validated the workflow with a manual run, showcasing its effectiveness in delivering accurate and timely results.
Looking ahead, the next phase of our journey involves harnessing the power of EventBridge. We aim to automate the workflow’s execution at regular intervals. This step will enhance the automation of our data pipeline. It will also enable consistent updates and adaptability to emerging data demands. With this forthcoming enhancement, we will optimize our operations further. We will also focus on deriving actionable insights from our data.
We are combining our current successes with strategic automation. This is paving the way for a future where our data processes are completely autonomous. Our team will be able to concentrate on innovation and informed decision-making. The path ahead is promising, and we are excited to embark on this next step in our automation journey.


Leave a Reply