In the highly competitive retail sector, forecasting product demand accurately is critical. It ensures optimal inventory levels and minimizes wastage. It also maximizes customer satisfaction. Retailers often struggle with stockouts or overstocking due to demand fluctuations, seasonality, and consumer trends.
This project aims to build a demand forecasting solution. It uses historical sales data for 50 items across 10 stores. This data spans a 5-year period, from 2013 to 2018. The dataset is sourced from Kaggle’s Store Item Demand Forecasting Challenge, which closely mimics real-world retail demand patterns.
The objective is to design and implement a robust data pipeline that:
- Ingests the raw historical sales data
- Cleans, transforms, and prepares it for analysis
- Enables Exploratory Data Analysis (EDA)
- Supports Machine Learning models to forecast future item demand
This pipeline will show how cloud-native serverless tools like AWS Glue, S3, Lambda, and CloudWatch can be used. These tools help build scalable and automated demand forecasting solutions. Such solutions are aligned with modern retail business needs.
Data Ingestion from Public Dataset (Kaggle)
For this project, we selected the publicly available dataset from the Kaggle Store Item Demand Forecasting Challenge. This dataset provides historical daily sales figures. It includes 50 unique items sold across 10 different stores. The data spans a 5-year period (2013–2018). This setup simulates realistic demand fluctuations in the retail industry.
Dataset Source
Platform: Kaggle
Challenge: Store Item Demand Forecasting
Objective: Predict 3 months of item-level daily sales at different store locations.
Size: 18.7 MB (3 CSV files)
Download Instructions
Once you land on the Kaggle competition page:
- Click the Data tab in the top navigation bar (see screenshot below).
- On the right-hand side, locate the Data Explorer section.
- Click Download All to get all relevant CSV files:
- train.csv (training data)
- test.csv (test data)
- If prompted, accept the competition rules and terms to enable the download.

Fig 1: Data tab location on Kaggle challenge page
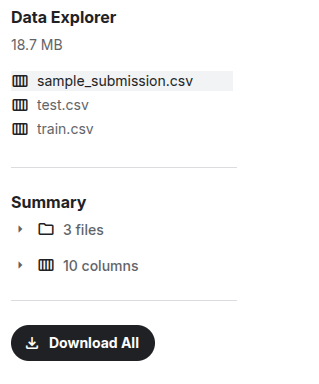
Fig 2: Data Explorer section showing files available for download
Upload to S3
Next step in the process is to upload the dataset in S3, our chosen data lake. To be able to upload the dataset in S3, let’s first create the S3 bucket and the directory structure.
Create S3 Bucket for Ingestion
Let’s create a dedicated S3 bucket to store raw and processed data. Create the following bucket in S3:
Bucket Name: scdf-project-data
And then create the following folder structure inside the bucket:
s3://scdf-project-data/
    └── raw/
    └── processed/
    └── training/
        ├── train.csv/
        └── test.csv/
This structure reflects a standard data lake zone architecture:
- raw/ → for unprocessed source files
- processed/ → for cleaned Parquet outputs
- training/ → for split CSVs (train.csv, test.csv) used in ML workflows
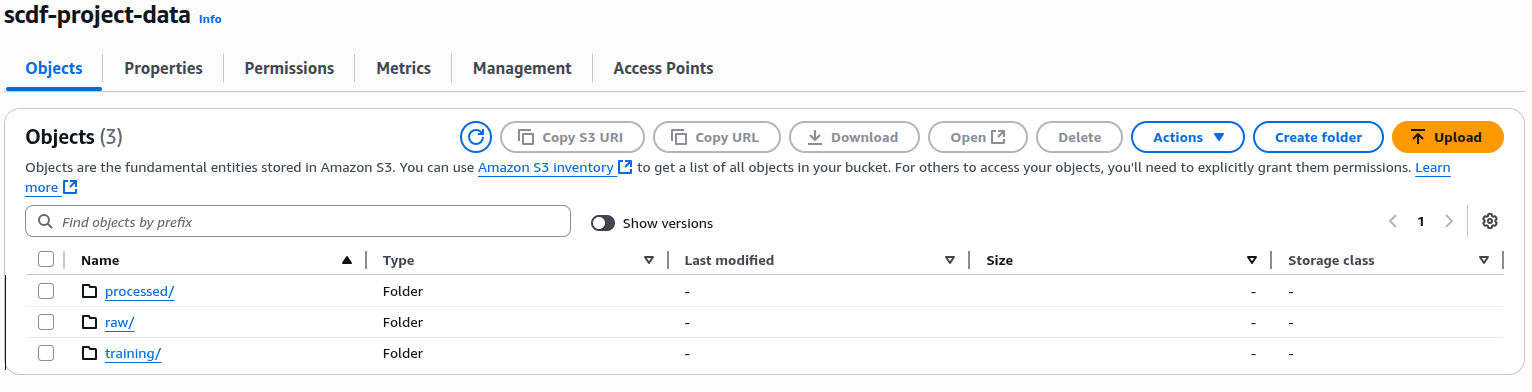
Fig 3: S3 folder organization
Upload to S3 (raw/)
You need to upload only the two relevant files — train.csv and test.csv — to the raw/ folder using the AWS Console. This setup allows downstream services like AWS Glue to access the data directly for transformation and analysis.
Data Preprocessing
The data has been ingested and is available in the raw/ folder in S3. We need to develop a serverless data preprocessing pipeline. This will be using AWS Glue and is written in PySpark.
Key Objectives
The preprocessing pipeline aims to:
- Remove nulls or corrupted rows (if any)
- Ensure correct data types
- Normalize numerical values for ML training
- Split data into train and test subsets
Overview of AWS Glue and PySpark
AWS Glue is a fully managed data integration service. It is serverless and comes from Amazon Web Services. This service is designed to build, run, and orchestrate extract-transform-load (ETL) pipelines at scale. It streamlines data engineering workflows by automatically provisioning resources, managing dependencies, and scaling execution environments without infrastructure management. Glue supports both visual (no-code) and code-based job authoring and integrates seamlessly with services like S3, Athena, Lambda, and CloudWatch. It also includes a metadata catalog for tracking and querying datasets across the data lake.
PySpark, the Python API for Apache Spark, is a distributed computing engine for large-scale data processing. It enables fast, parallelized ETL operations across clusters of virtual nodes. Using familiar Python syntax, developers can define complex transformations and analytics while leveraging Spark’s performance and scalability. PySpark supports SQL queries, machine learning pipelines, and streaming data — essential components of modern, cloud-native data workflows.
Why We Chose AWS Glue with PySpark
This project requires an automated, cloud-native pipeline for ingestion, cleaning, and transformation. It also demands train-test splitting on a moderately sized dataset (91,000+ rows). AWS Glue was selected for its serverless, scalable ETL capabilities, eliminating infrastructure management and fitting periodic batch workflows. Its native S3 integration, IAM compatibility, and logging via CloudWatch are essential for building a secure and observable pipeline.
PySpark was chosen as the underlying execution engine for its performance and versatility. It enables type casting, missing value handling, Min-Max scaling, and dataset partitioning with concise Python code. Key features like .randomSplit() and MLlib transformers such as MinMaxScaler make PySpark well-suited for preprocessing in demand forecasting. It also provides scalability for larger datasets as the project expands.
Data Preprocessing with AWS Glue
The dataset is first ingested into S3. The next logical step is to prepare the data for analysis. Additionally, it’s prepared for machine learning. This phase is called data preprocessing — and it typically includes:
- Cleaning the data (e.g. handling missing values)
- Ensuring correct data types
- Scaling or normalising numerical features
- Structuring the dataset for training and testing (splitting)
Our goal here is to build a repeatable, serverless, and cloud-native preprocessing pipeline. This pipeline reads from the S3 raw/ folder. It performs these transformations. It outputs cleaned, structured data to S3 processed/ and training/.
For our purposes we have chosen AWS Glue. We chose AWS Glue because of the following reasons:
- It is serverless — no infrastructure to manage
- It supports PySpark, allowing efficient, distributed processing using familiar Python syntax
- It natively integrates with S3, CloudWatch, and IAM
- It’s ideal for ETL jobs that run periodically or in response to ingestion events
This makes Glue perfect for automating preprocessing pipelines in a scalable and cost-effective way.
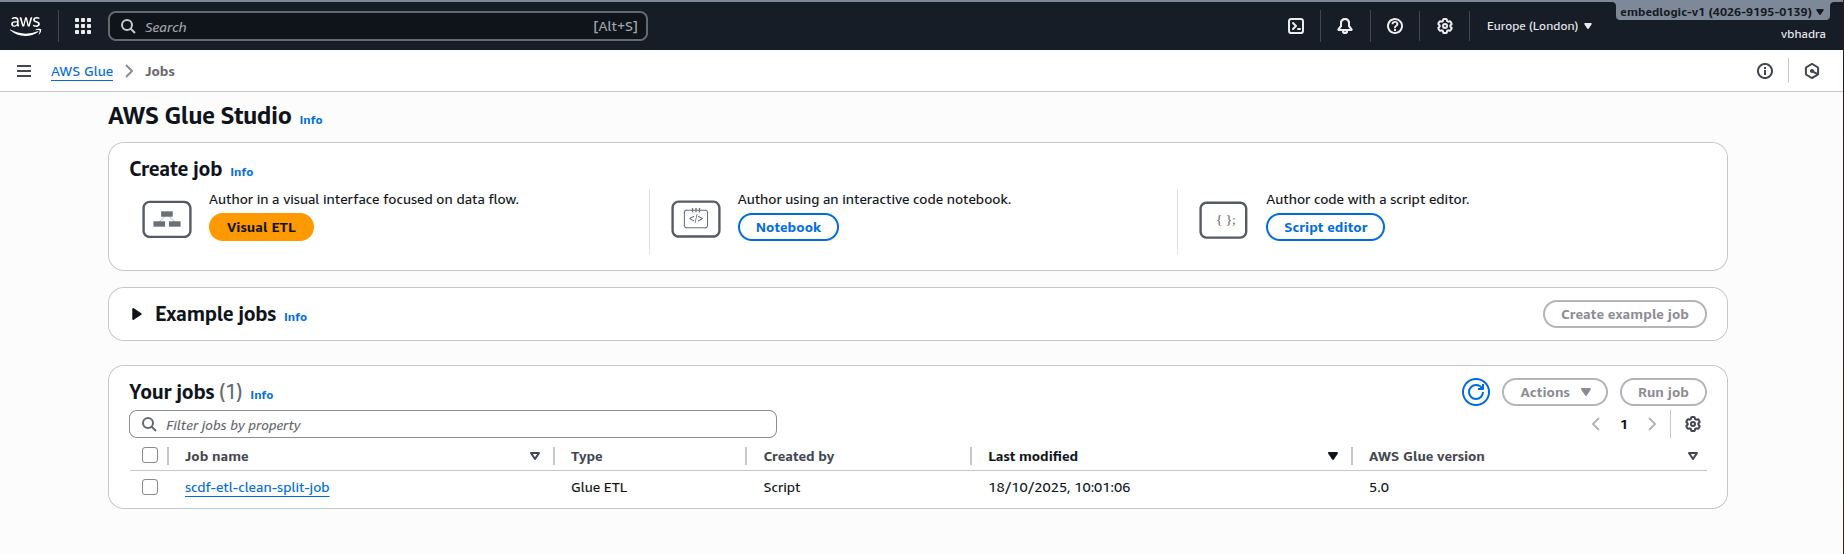
Creating Glue Job in AWS
The next step is to create a Glue ETL job in AWS. For that go to Glue in AWS console.
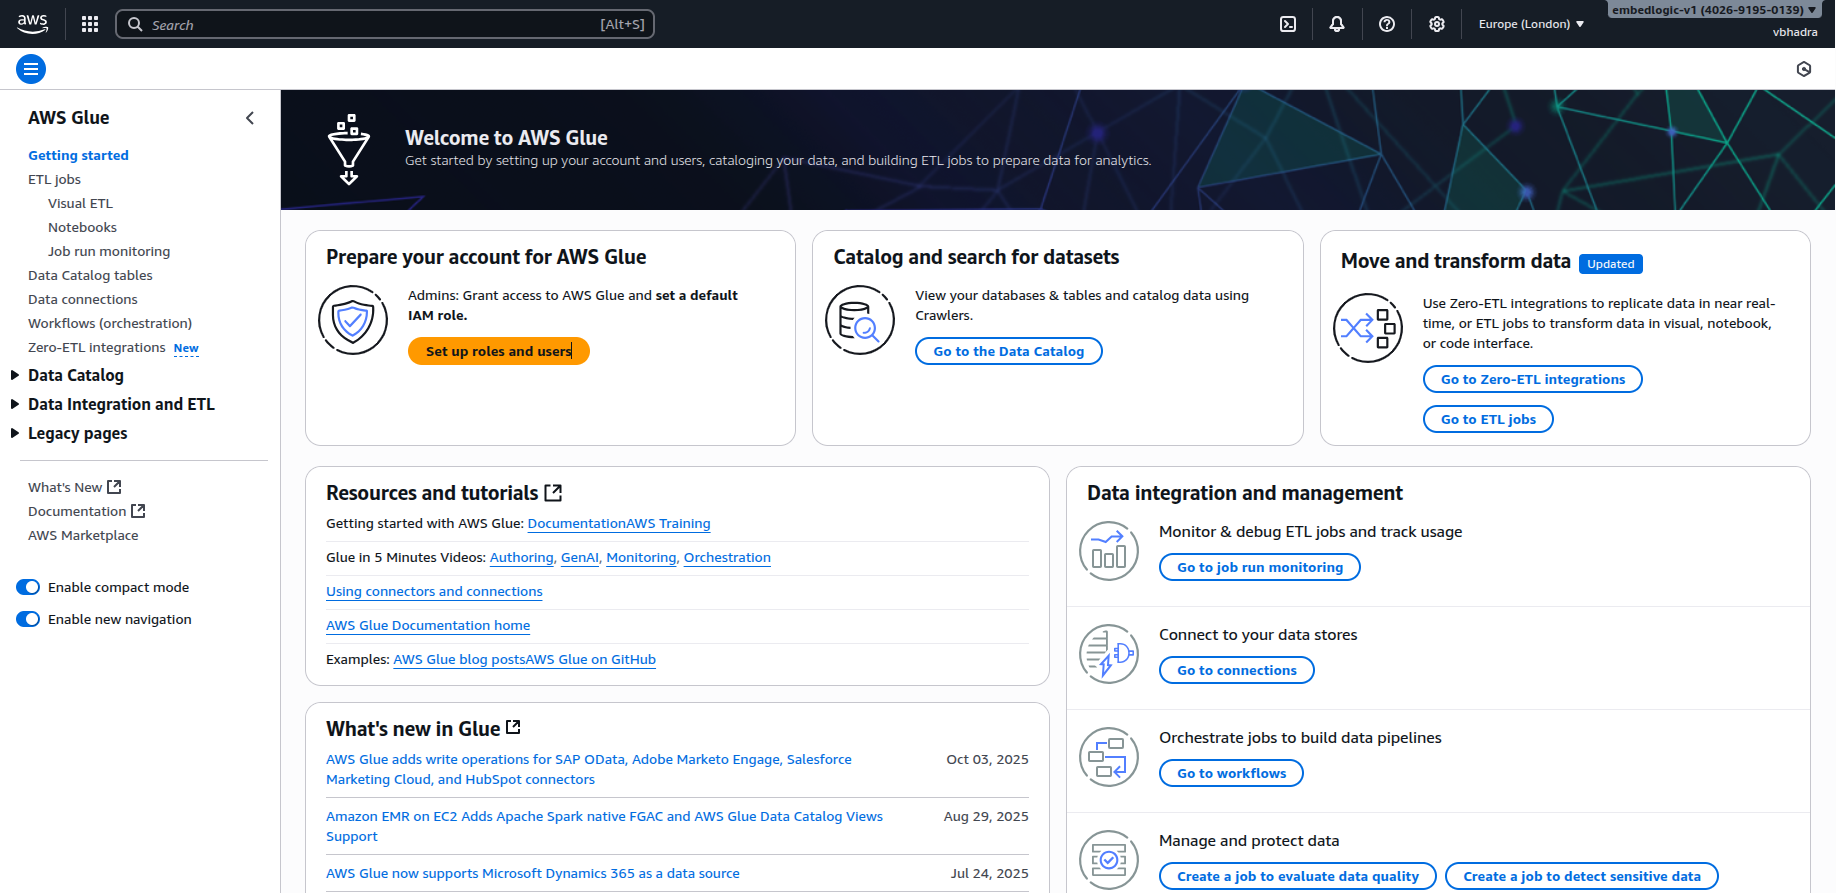
One the right hand pane, navigate to the ETL Jobs as shown in the figure below:
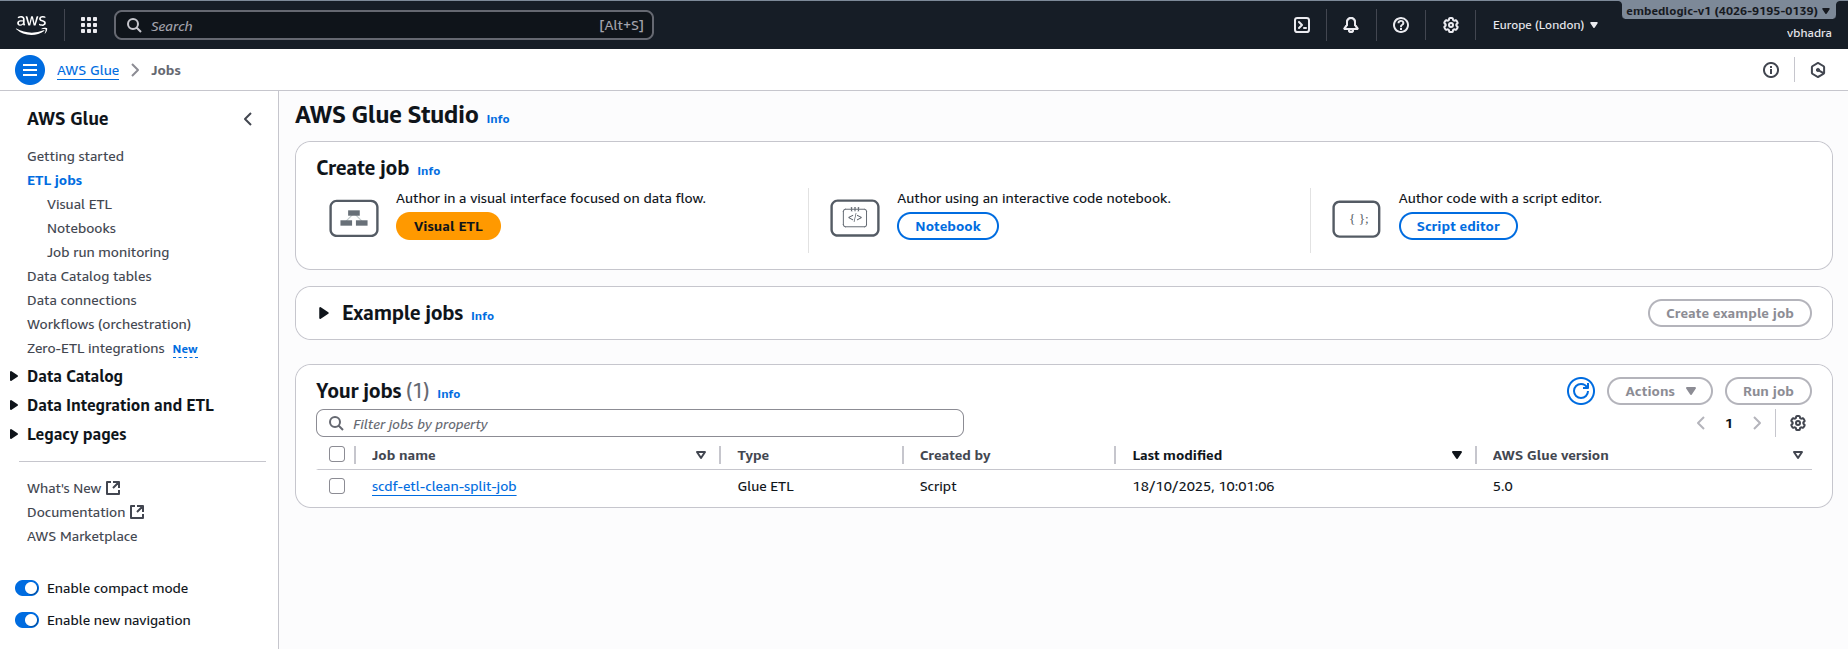
There are three ways you can create an Glue ETL job:
- Visual ETL
- Notebook
- Script Editor
We will use Script Editor. Click on the Script Editor icon on the right. It will ask to choose Engine to use, select Spark and in Options Start Fresh. Both are thankfully default options.

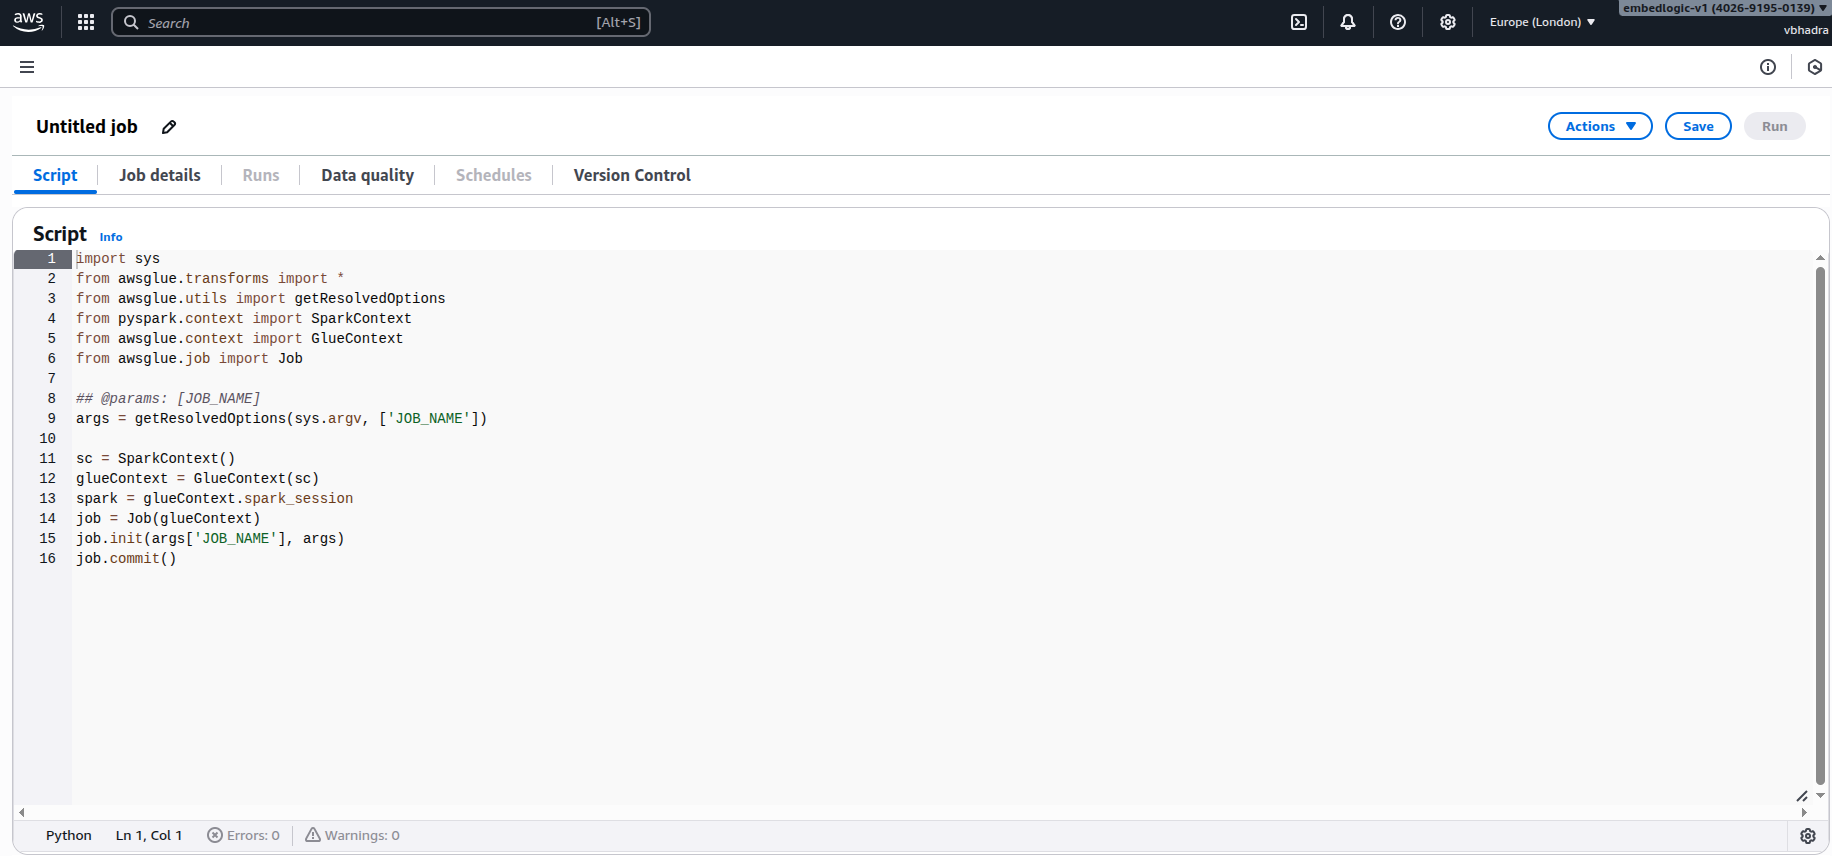
Then click the “Create script” button. This will open the script editor as shown in the figure below:

Name the script something which you can relate to this task in hand. In my case I named it: scdf-etl-clean-split-job.
Python ETL Script for Glue Job
To implement this job, we wrote a PySpark-based ETL script that performs the following:
- Loads the train.csv dataset from the S3 raw/ folder
- Drops any rows with missing or null values
- Casts all relevant columns to appropriate data types (e.g. sales to int, date to date)
- Writes cleaned data to the processed/ folder in Parquet format
- Splits the data randomly into 80% training and 20% testing
- Writes both train and test splits as CSVs into the training/ folder
GitHub Source
The full script is hosted on GitHub and can be downloaded here:
📎Glue Job Script Initial Preprocessing
You can copy and paste the code into the Glue Studio Script Editor, or upload it as a .py file into an S3 location and reference it from the job.
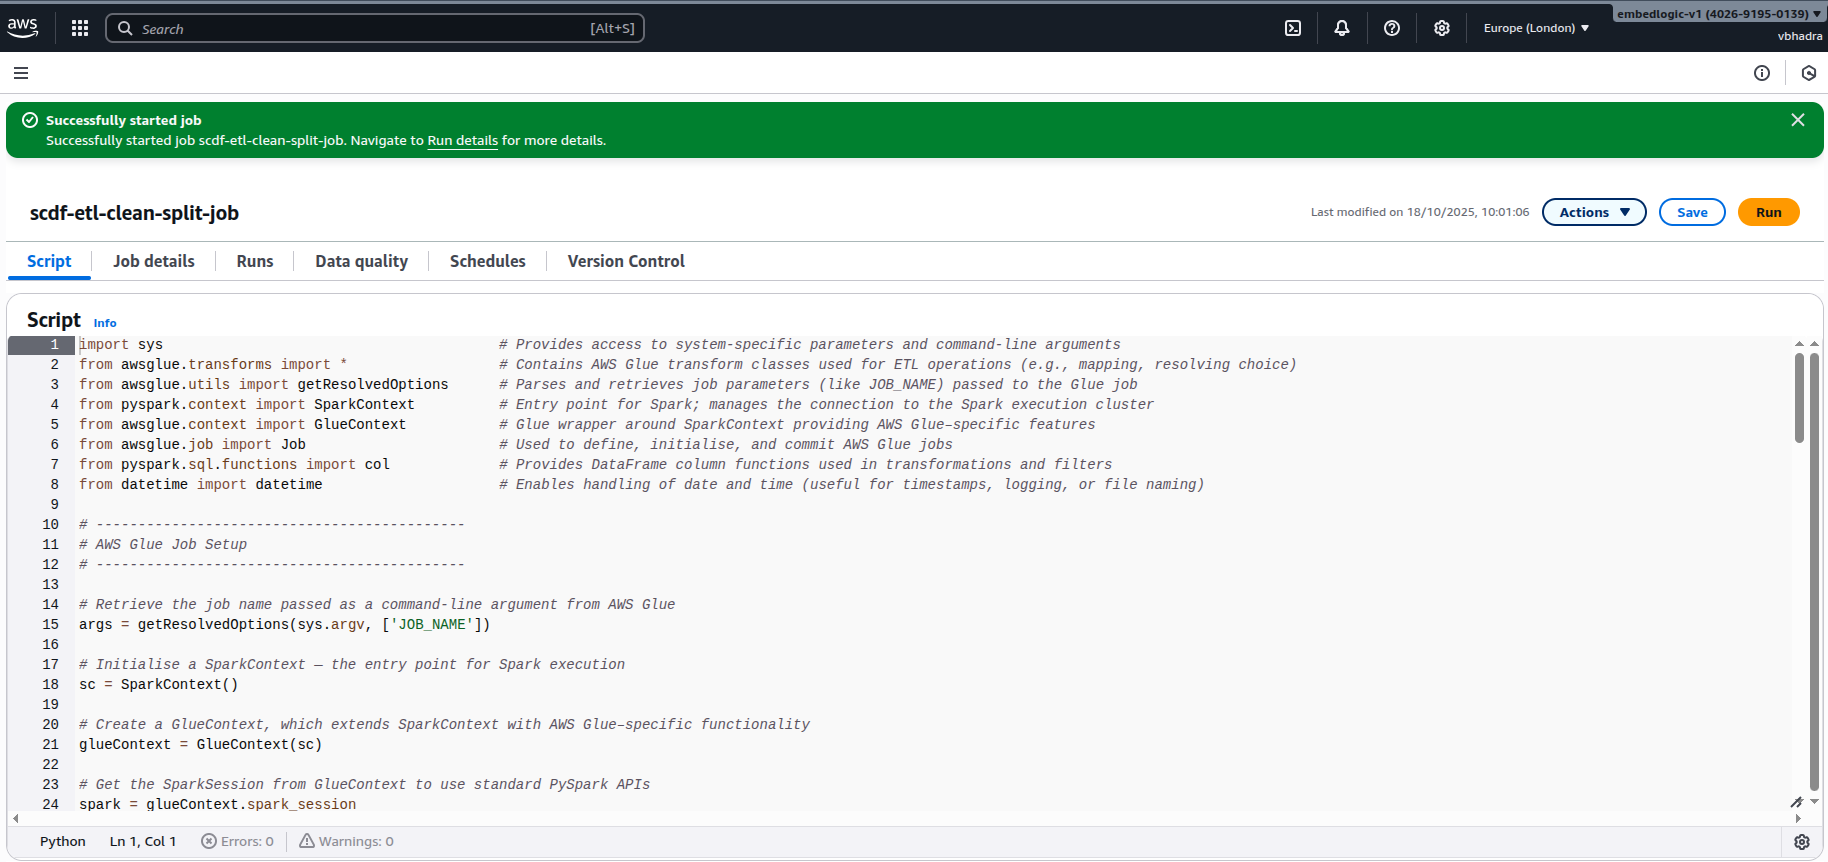
Developing the Python ETL Script
The Python script below implements a complete Extract–Transform–Load (ETL) pipeline using AWS Glue and PySpark. It reads raw sales data from Amazon S3 and cleans it. Then, it converts the data to a more efficient storage format. The data is split into training and testing subsets. Finally, it writes the results back to S3 while maintaining Glue’s job-tracking capabilities.
Job Initialization
The script we are developing begins by importing the necessary libraries and setting up the AWS Glue job environment. This includes SparkContext, GlueContext, and Job, which collectively provide the execution context for distributed ETL operations.
import sys
from awsglue.transforms import *
from awsglue.utils import getResolvedOptions
from pyspark.context import SparkContext
from awsglue.context import GlueContext
from awsglue.job import Job
from pyspark.sql.functions import col
from datetime import datetime
The job parameters, such as the job name, are retrieved from Glue’s command-line arguments. The Spark and Glue contexts are then initialized.
args = getResolvedOptions(sys.argv, ['JOB_NAME'])
sc = SparkContext()
glueContext = GlueContext(sc)
spark = glueContext.spark_session
job = Job(glueContext)
job.init(args['JOB_NAME'], args)
This setup ensures that the script runs within AWS Glue’s distributed Spark infrastructure. It is properly registered for monitoring and logging.
args = getResolvedOptions(sys.argv, ['JOB_NAME'])The getResolvedOptions() function reads from sys.argv. When AWS Glue runs the job, it automatically appends –JOB_NAME scdf-etl-clean-split-job to sys.argv.
Reading the Raw Data from S3
Once the environment is ready, the script reads the input dataset from the raw zone of the S3 bucket. The path points to the uploaded Kaggle sales dataset (base_sales.csv).
input_path = "s3://scdf-project-data/raw/base_sales.csv"
df = spark.read.option("header", "true").csv(input_path)
This step ingests the CSV file into a Spark DataFrame, allowing distributed operations across the cluster. The header=true option ensures that column names from the file’s first row are retained for ease of reference.
Data Cleaning and Transformation
Before analysis, basic cleaning is performed to remove missing or invalid entries.
Here, dropna() is used as a minimal preprocessing step.
df_cleaned = df.dropna()This ensures the dataset remains consistent and reliable for downstream tasks. Additional cleaning steps like type casting or outlier removal could be added later as part of the DataOps phase.
Writing the Cleaned Data to the Processed Zone
Cleaned data is then written to the processed/ folder in Parquet format, which offers column‑based compression and faster analytics performance.
processed_path = "s3://scdf-project-data/processed/"
df_cleaned.write.mode("overwrite").parquet(processed_path)
The processed zone forms a clean, structured data layer — a key component of a production‑ready data lake.
Splitting the Data for Model Training and Testing
Once the dataset is cleaned, the next step is to divide it into two parts. One part is for training the machine learning model. The other part is for testing how well the model performs on unseen data.
We use an 80:20 ratio, meaning 80% of the data goes into training and 20% is reserved for testing. Splitting the data is a standard practice in machine learning to evaluate model performance objectively. The model is trained on one portion (training set) and then tested on data it hasn’t seen before (test set). This helps detect issues like overfitting. In overfitting, a model performs well on known data but poorly on new inputs. This approach ensures the solution generalises well to real-world scenarios. Using a fixed split also ensures consistency across experiments and makes comparisons fair and repeatable.
train_df, test_df = df_cleaned.randomSplit([0.8, 0.2], seed=42)Here, the randomSplit() function does exactly what it says — it randomly divides the dataset. The seed=42 ensures that this split is reproducible every time the job runs. This is important because consistency across pipeline runs helps avoid surprises and ensures fairness when evaluating model performance.
Writing Training and Testing Data to S3
The resulting datasets are stored separately under the training/ directory in S3. Each subset is saved as CSV for easy integration with ML frameworks such as SageMaker or scikit‑learn.
output_prefix = "s3://scdf-project-data/training/"
train_df.write.mode("overwrite").option("header", "true").csv(output_prefix + "train.csv")
test_df.write.mode("overwrite").option("header", "true").csv(output_prefix + "test.csv")
This ensures modularity — analytical and ML pipelines can directly consume data from clearly defined S3 paths.
Finalising and Committing the Job
Finally, the Glue job is committed to mark successful completion. This step is important for job tracking and triggering dependent workflows within AWS Glue.
job.commit()IAM Role and Policy Setup for AWS Glue ETL
We first created a dedicated IAM role. This enabled our Glue job to securely interact with AWS services like Amazon S3 and AWS Glue itself. At runtime, AWS Glue assumes this role. The role must include all necessary permissions for reading and writing data. It must also grant access to scripts and allow running jobs successfully.
Create a Custom IAM Role for AWS Glue
Before running any Glue job, you need to assign it a role with the correct trust relationship and access policies. Here’s how we created our role:
Create the IAM Role
- Navigate to the IAM Console:
https://console.aws.amazon.com/iam - Click “Roles” → “Create role”
- Choose Trusted Entity:
- Select “AWS service”
- Use case: Choose “Glue”
- Click “Next” to skip permissions for now (we’ll attach custom ones shortly)
- Name your role something descriptive: scdf-ingest-simulator-role
- Click “Create role”. This role will allow the Glue service to assume it during job execution.
Attach Custom IAM Policies
Once the role is created, we attached two inline policies:
Policy 1: AllowS3IngestOps
Purpose
This policy allows the Glue job to:
- Read raw input files from raw/
- Write cleaned and split data to processed/ and training/
- List the S3 bucket
- Handle special $folder$ marker objects that Glue sometimes writes automatically
{
    "Version": "2012-10-17",
    "Statement": [
        {
            "Effect": "Allow",
            "Action": [
                "s3:GetObject",
                "s3:PutObject",
                "s3:DeleteObject",
                "s3:ListBucket"
            ],
            "Resource": [
                "arn:aws:s3:::scdf-project-data",
                "arn:aws:s3:::scdf-project-data/raw/*",
                "arn:aws:s3:::scdf-project-data/processed/*",
                "arn:aws:s3:::scdf-project-data/training/*",
                "arn:aws:s3:::scdf-project-data/processed_$folder$",
                "arn:aws:s3:::scdf-project-data/training_$folder$"
            ]
        }
    ]
}
Policy 2: AllowGlueAssetsAccess
PurposeThis policy allows AWS Glue to access its own internal assets bucket, such as:
- Script files
- Job metadata
- Dependencies stored in AWS-managed S3 locations
{
    "Version": "2012-10-17",
    "Statement": [
        {
            "Effect": "Allow",
            "Action": [
                "s3:GetObject",
                "s3:ListBucket"
            ],
            "Resource": [
                "arn:aws:s3:::aws-glue-assets-402691950139-eu-west-2",
                "arn:aws:s3:::aws-glue-assets-402691950139-eu-west-2/*"
            ]
        }
    ]
}
Policy 3: AllowCloudWatchLogsForGlue
If you would like to generate CloudWatch logs after the Glue job executes you need to attach the following CloudWatch log permissions to your IAM role:
{
  "Version": "2012-10-17",
  "Statement": [
    {
      "Effect": "Allow",
      "Action": [
        "logs:CreateLogGroup",
        "logs:CreateLogStream",
        "logs:PutLogEvents"
      ],
      "Resource": [
        "arn:aws:logs:eu-west-2:402691950139:log-group:/aws-glue/jobs/*"
      ]
    }
  ]
}
How to Attach the Policies
For each policy:
- Go to IAM → Roles
- Click your role: scdf-ingest-simulator-role
- Scroll to Permissions → Add inline policy
- Click “JSON” tab, paste the policy content
- Click “Review policy”, give it a name (e.g., AllowS3IngestOps)
- Click Create policy
Repeat for the second and third policy.
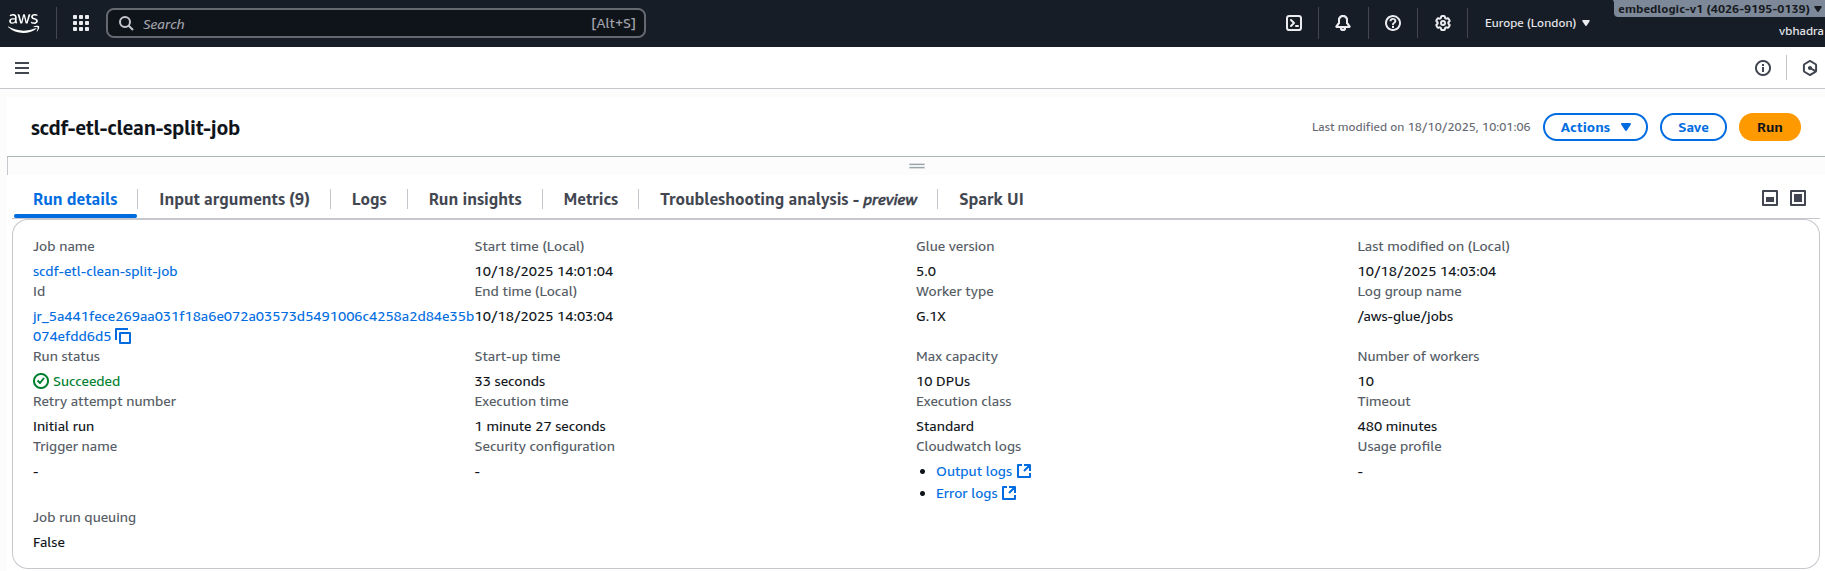
Running the ETL Job in AWS Glue
This section will walk you through the following steps:
Open Glue Studio and navigate to Jobs:
Selecting scdf-etl-clean-split-job:
Clicking Run. You should see a message like the below on the screen:
Successfully started job. Successfully started job scdf-etl-clean-split-job. Navigate to Run details for more details.
Monitoring job status (succeeded/failed). Go to Runs Tab for the status of the job started:
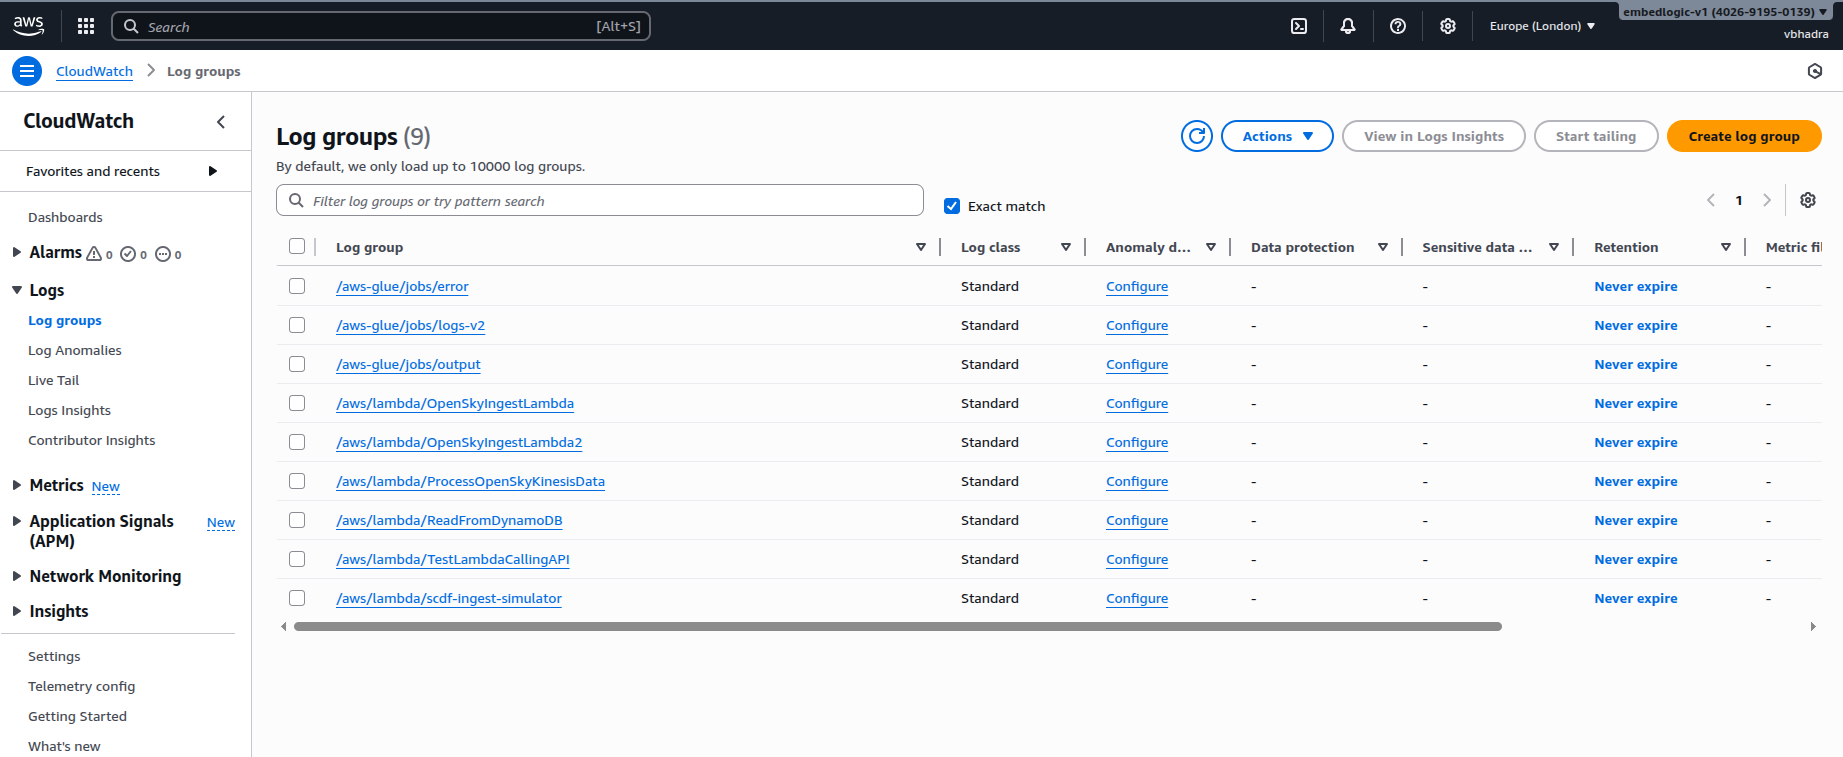
Viewing logs in CloudWatch. Go to the CloudWatch service in AWS and navigate to Log Groups and under log groups you should be able to see an entry created for the Glue job, named something like the below:
/aws-glue/jobs/error
Check the logs and see if there is something interesting.
Verifying output in:
- s3://scdf-project-data/processed/
- s3://scdf-project-data/training/train.csv/
- s3://scdf-project-data/training/test.csv/
Our data pipeline is now live and operational. We’ve successfully ingested raw sales data and cleaned it. We then split it into training and testing datasets. This was done using a scalable, serverless ETL workflow powered by AWS Glue and PySpark. This sets the stage for developing a demand forecasting system of production quality. It can effortlessly manage large volumes of retail data.
Continue Reading
The next part of this series expands on the preprocessing stage of the pipeline. It introduces data type casting and missing value handling. It also covers scaling and observability improvements for machine learning readiness.
Read it here: Enhancing Your ETL Pipeline with AWS Glue and PySpark


4 Comments