As the weekend came to a close, I decided to finish it with a focused task — getting hands-on with CUDA programming on an NVIDIA GPU. I don’t have a machine at the moment that comes with an NVIDIA GPU, so AWS seemed like the perfect platform to explore GPU computing without any hardware constraints.
After a bit of experimentation and setup, I finally managed to configure an AWS EC2 instance equipped with NVIDIA GPU support for CUDA development. The goal was straightforward — to validate the environment setup for GPU-accelerated computing on AWS and to share a clear, end-to-end walkthrough of the process.
However, what began as a smooth configuration exercise took an unexpected turn. Before I could launch the GPU-enabled EC2 instance, I encountered a capacity issue. My account didn’t have the necessary vCPU quota for GPU instance families. It was a reminder that on AWS, even straightforward deployments can get blocked by service limits.
I followed AWS diagnostics. I identified the cause. Then, I navigated through the Service Quotas console and submitted a request for a quota increase. This step often surprises people. I decided to share my experience here as a quick heads-up for anyone working with GPU-enabled instances on AWS. Hopefully, this walk-through helps others spot the issue early. They can fix it fast and move on with their GPU setup without unnecessary delays.
Setting Up AWS Environment
AWS is my one-stop console. This time I wanted to see how it could help me. I aimed to run a CUDA program on an NVIDIA GPU instance without owning a high-end GPU machine myself. My local setup simply doesn’t have that kind of hardware, so AWS seemed like the perfect place to experiment.
To do this, we first need to set up the AWS environment. Then, we will launch an EC2 instance with the right configuration. Once that’s in place, we can start running CUDA programs directly on the cloud.
EC2 Configuration
For this setup, we’ll use the AWS Deep Learning AMI (Ubuntu). It conveniently comes preinstalled with NVIDIA drivers and CUDA (nvcc). That saves us a lot of setup time.
To launch the EC2 instance, open your AWS Console → EC2, and follow these steps:
Name and Tags
Give your instance a meaningful name, something like cuda-vector-multiplication.
This helps you easily identify it later when managing multiple instances.

In the Amazon Machine Language (AMI) go to the Quick Start Tab and select Amazon Linux AWS (default).
Selecting the Right AMI
In the Amazon Machine Image (AMI) section, go to the Quick Start tab. You’ll see several popular OS options like Amazon Linux, Ubuntu, Red Hat, and others. Amazon Linux is selected by default.

Just below this you will see a list of AMIs to be chosen from. For our purpose, we’ll search for “Deep Learning AMI (Ubuntu)” in the search bar just below. This AMI is perfect for GPU-based workloads. It comes pre-loaded with NVIDIA drivers, CUDA (nvcc), and essential deep learning libraries. Once it appears in the dropdown list, select it to continue. Search for “Deep Learning AMI” and it should come up in the drop down list, select it:

Choose Instance Type
Next, choose the instance type g4dn.xlarge (1× T4 GPU).
This configuration gives you access to one NVIDIA T4 GPU and is ideal for CUDA-based workloads without being overly expensive.

Create or Select a Key Pair
Create a new RSA key pair if you don’t already have one. Download and keep it in a secure location — you’ll need it later to connect to the instance via SSH.

Download the key pair. Keep it in a known safe place. We will need the key pair to SSH into the EC2 instance.
Network Settings
Leave the default network settings unchanged, but ensure SSH access is enabled.
This allows you to securely log in and run your CUDA programs once the instance is live.In the Network Settings leave everything default (just make sure ssh is enabled).
Launch the Instance
Finally, scroll down and click Launch Instance.
AWS will begin provisioning your instance. This step usually takes a few minutes.
Troubleshooting
Everything looked set so far until I clicked Launch Instance, AWS threw an unexpected error.
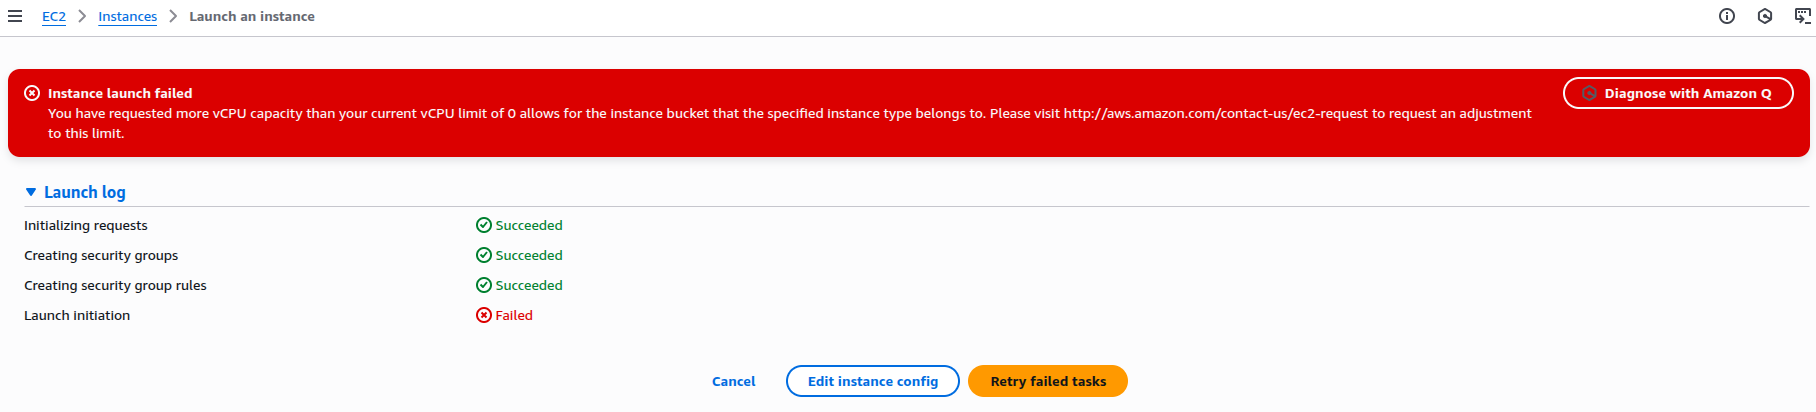
The message read:
Instance launch failed: You have requested more vCPU capacity than your current vCPU limit of 0 allows for the instance bucket that the specified instance type belongs to.
In simple terms, I didn’t have enough vCPU quota in my AWS account. Therefore, I was unable to launch a GPU-enabled EC2 instance, specifically the g4dn.xlarge type. This quota limit is applied per region and per instance family (like g4dn, p3, t2, and so on).
Before launching any GPU instance, ensure your account has the right Service Quotas set. AWS requires these for the corresponding instance family.
Diagnosing the vCPU Quota Error
To understand the situation better, I used the “Diagnose with Amazon Q” option. It appeared right beside the error message. AWS’s diagnostic tool analysed the failed instance launch and provided a detailed breakdown of the issue.
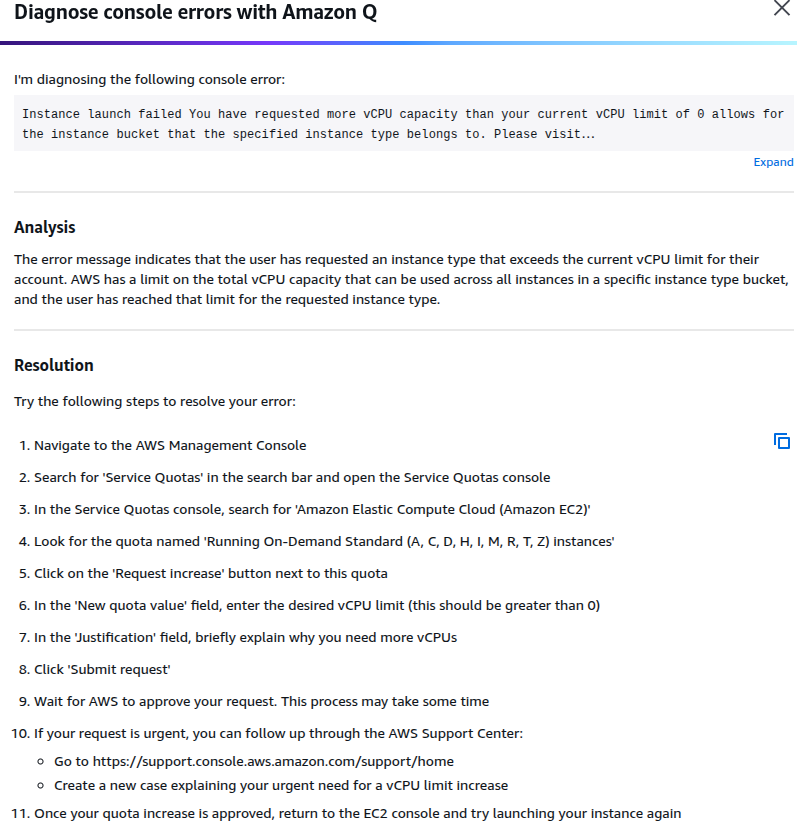
The diagnostic summary confirmed my suspicion. The error occurred because I had hit the vCPU limit for the GPU instance family.
Each AWS account has a specific quota. This quota defines the number of virtual CPUs (vCPUs) that can be allocated per instance family. Instances include g4dn, p3, or t2, in a particular region.
In my case, the vCPU quota for the GPU family (g4dn) was set to zero. This meant I couldn’t launch any GPU-backed EC2 instance. I needed to increase this limit first.
Requesting the Quota Increase
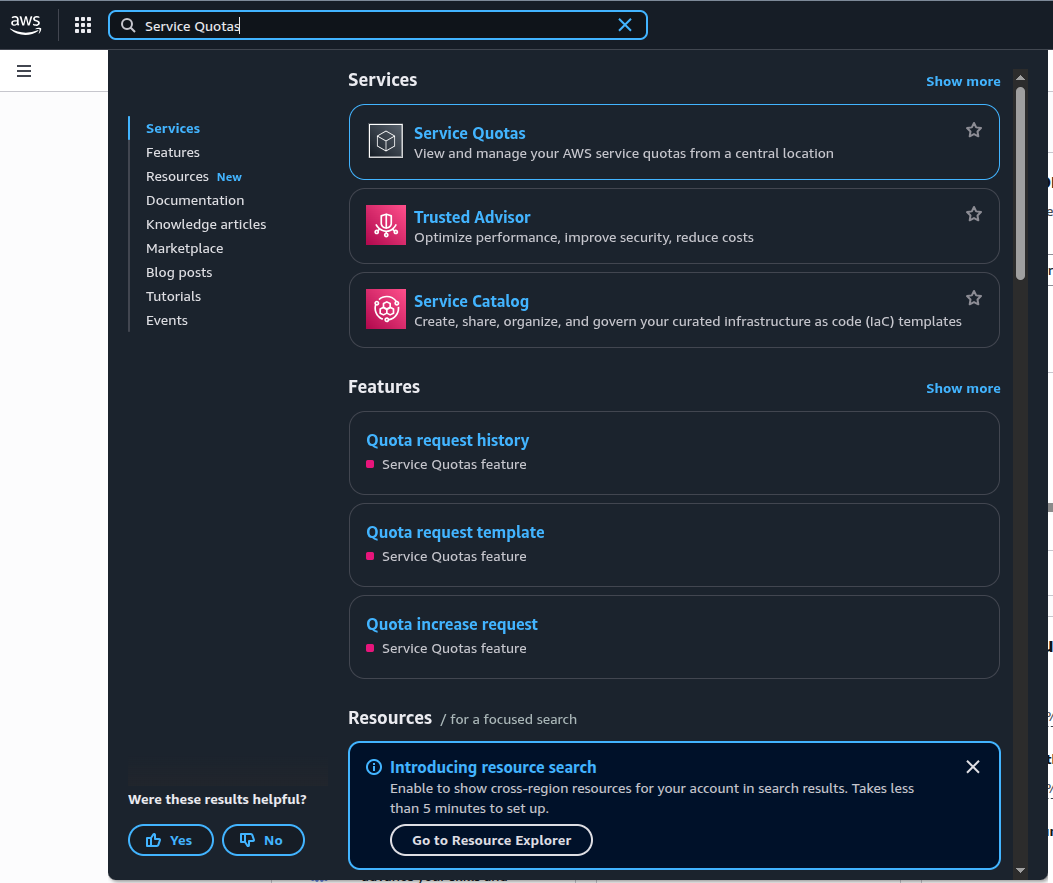
With the issue clearly identified, the next step was to request an increase in my vCPU quota for GPU instances. Thankfully, AWS provides a centralized way to manage such limits through the Service Quotas console. To open the Service Quotas console, I simply searched for “Service Quotas” from the AWS Management Console’s search bar. This tool lets you view, track, and request quota increases across different AWS services — all from a single place.
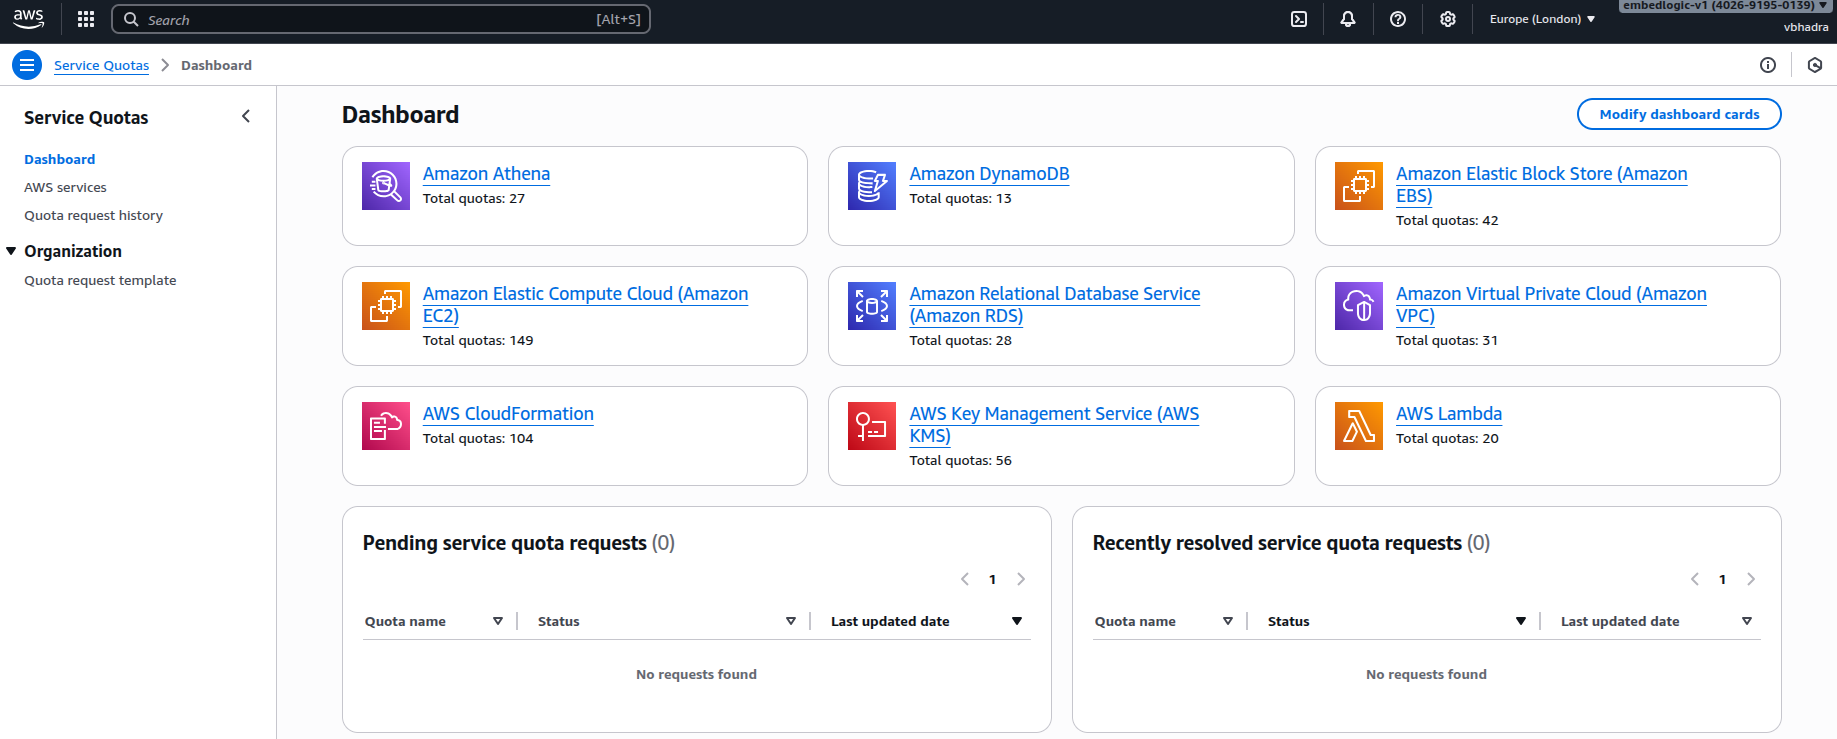
Once inside, I clicked on Dashboard from the left-hand menu. This brings up a list of all available AWS services for which quotas can be managed.

From here, I selected Amazon Elastic Compute Cloud (Amazon EC2) to view all EC2-related service quotas. My focus at this point was to identify the specific quota that controls GPU-backed instance launches.
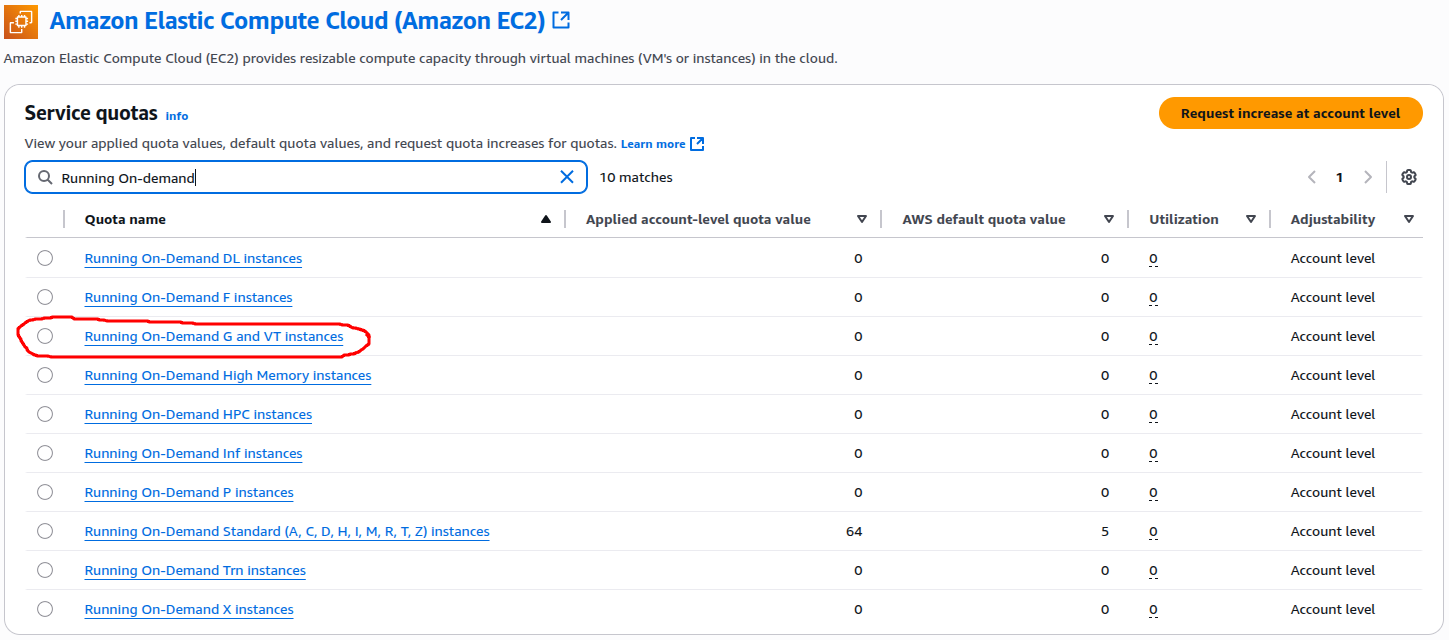
My focus at this point was to identify the specific quota that controls GPU-backed instance launches. I opened Amazon Elastic Compute Cloud (Amazon EC2) in the Service Quotas console. Then, I searched for Running On-Demand to narrow down the list of quotas. That’s where I spotted the key entry. It was Running On-Demand G and VT instances. This directly corresponds to GPU-backed EC2 families such as g4dn or p3.
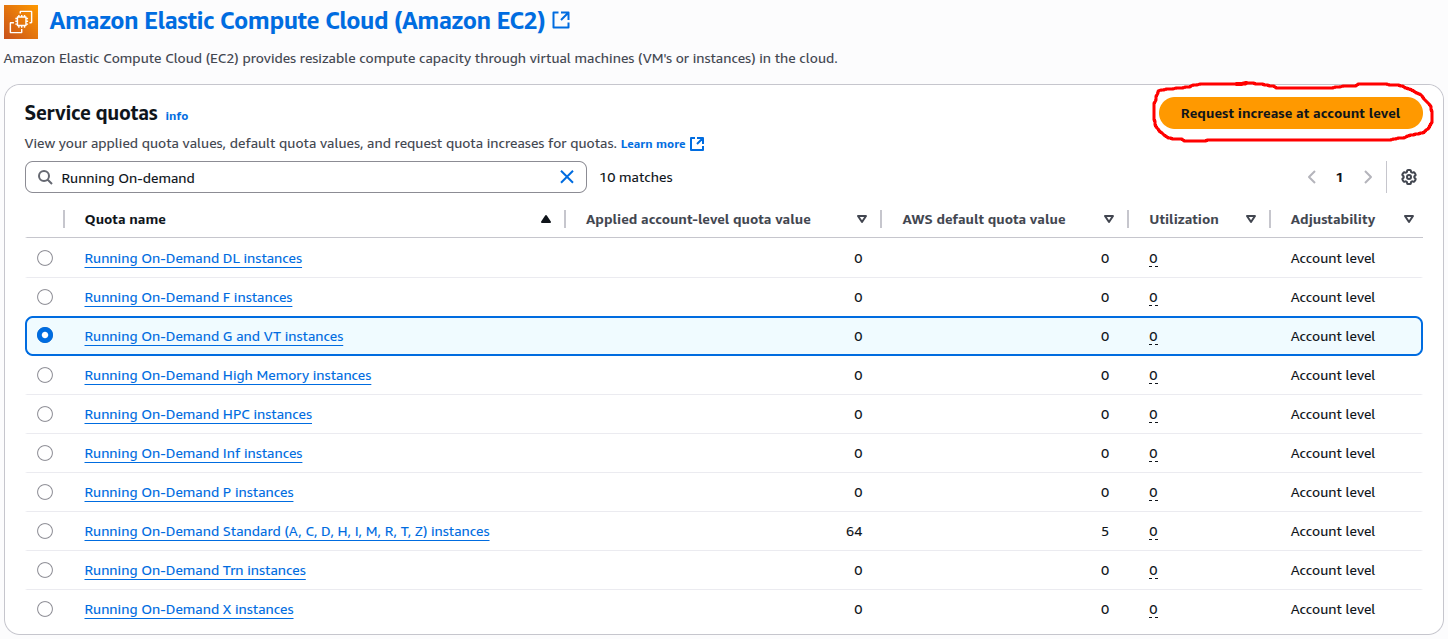
As highlighted in the screenshot, AWS provides an option to Request increase at account level on the top right. Clicking this opens a simple form where you can specify the new quota limit you need.
After selecting the correct quota, AWS opens a dialogue box titled Request quota increase: Running On-Demand G and VT instances.
In this dialogue, I entered 4 as the new quota value. This number represents the vCPUs I wanted to allocate for GPU instances in the g4dn family.
It’s worth noting that AWS approvals vary depending on the size of the request. Smaller increases are sometimes approved automatically, while larger ones are reviewed by the AWS support team.
Once done, I simply clicked the Request button to submit it.
At this point, the request gets registered with AWS Support. You can track its progress under the Quota request history section of the Service Quotas console.

Once the request was submitted, AWS displayed a confirmation banner at the top of the Service Quotas console — “Submitting Quota Increase Request for Running On-Demand G and VT Instances with requested value of 4.”
That message confirmed my request had been successfully registered. At this point, AWS begins processing the request. This process may take a few minutes. It might take several hours, depending on the region and the size of the quota increase.

The request was submitted. AWS displayed a confirmation banner at the top of the Service Quotas page. It indicated that my quota increase request for Running On-Demand G and VT Instances had been successfully registered.

To confirm that my request had gone through properly, I clicked on Quota request history from the left-hand menu. This page lists all your recent quota increase requests. It shows their type. It also displays their current status and any associated AWS support cases.
At this stage, my request for the Running On-Demand G and VT Instances quota appeared as Pending. This means AWS had received it and was reviewing it. The approval can take a few minutes to several hours. The duration depends on the type of instance and the selected region.

Once submitted, my request appeared under Quota request history with the status marked as Pending. This means AWS has received the request and is now reviewing it for approval. The review time depends on the instance type. It also depends on the size of the requested quota. The review may take a few minutes or sometimes a couple of hours.

A few minutes later, the status changed from Pending to Case Opened. This means AWS Support has officially created a case for the quota increase request and will now process it. You can click on the case number link to view the details or add any clarifying comments if needed.

At this stage, AWS might approve the request automatically. Alternatively, it may route it for manual review. This depends on my account’s history and the requested quota size. Usually, smaller requests (like four vCPUs for GPU instances) get approved fairly quickly. Once the case is closed, the new quota limit will be reflected in your Service Quotas dashboard. We can then proceed with launching our GPU instance.
Once the service quota request is approved, I’ll write a follow-up blog to continue with my original mission — running CUDA programs on an NVIDIA GPU instance in AWS.


1 Comment