In today’s interconnected world, real-time location tracking plays a crucial role in many industries. These include logistics and fleet management. It is also vital to smart city infrastructure. Cloud-based solutions offer the scalability and reliability needed to handle continuous GPS data streams efficiently.
This blog post guides you in setting up a real-time GPS data processing system on AWS. It leverages services like AWS IoT Core, AWS Lambda, Amazon DynamoDB, and CloudWatch. By the end of this guide, you will have a fully functional system. It will ingest GPS data, process it, and retrieve it in real time.
We will cover:
- Configuring AWS services for seamless data flow.
- Processing and storing GPS data using serverless functions and DynamoDB.
- Querying and retrieving GPS data efficiently.
- Monitoring logs to debug and optimize system performance.
Whether you’re a cloud computing beginner, this guide provides step-by-step instructions. If you are an experienced AWS user, it will help you build your system. You can then deploy your system to implement real-time GPS tracking.
Setting Up AWS Account & IAM Role
- Sign in to the AWS Console.
- Navigate to IAM (Identity and Access Management).
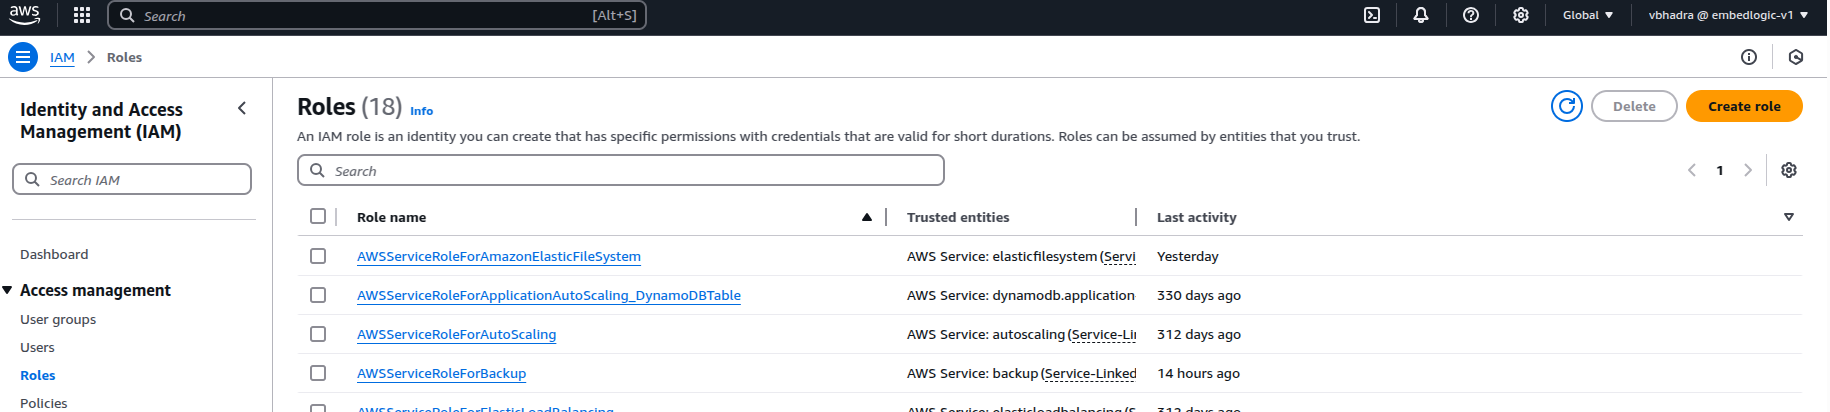
Create a new IAM role for Lambda as below:
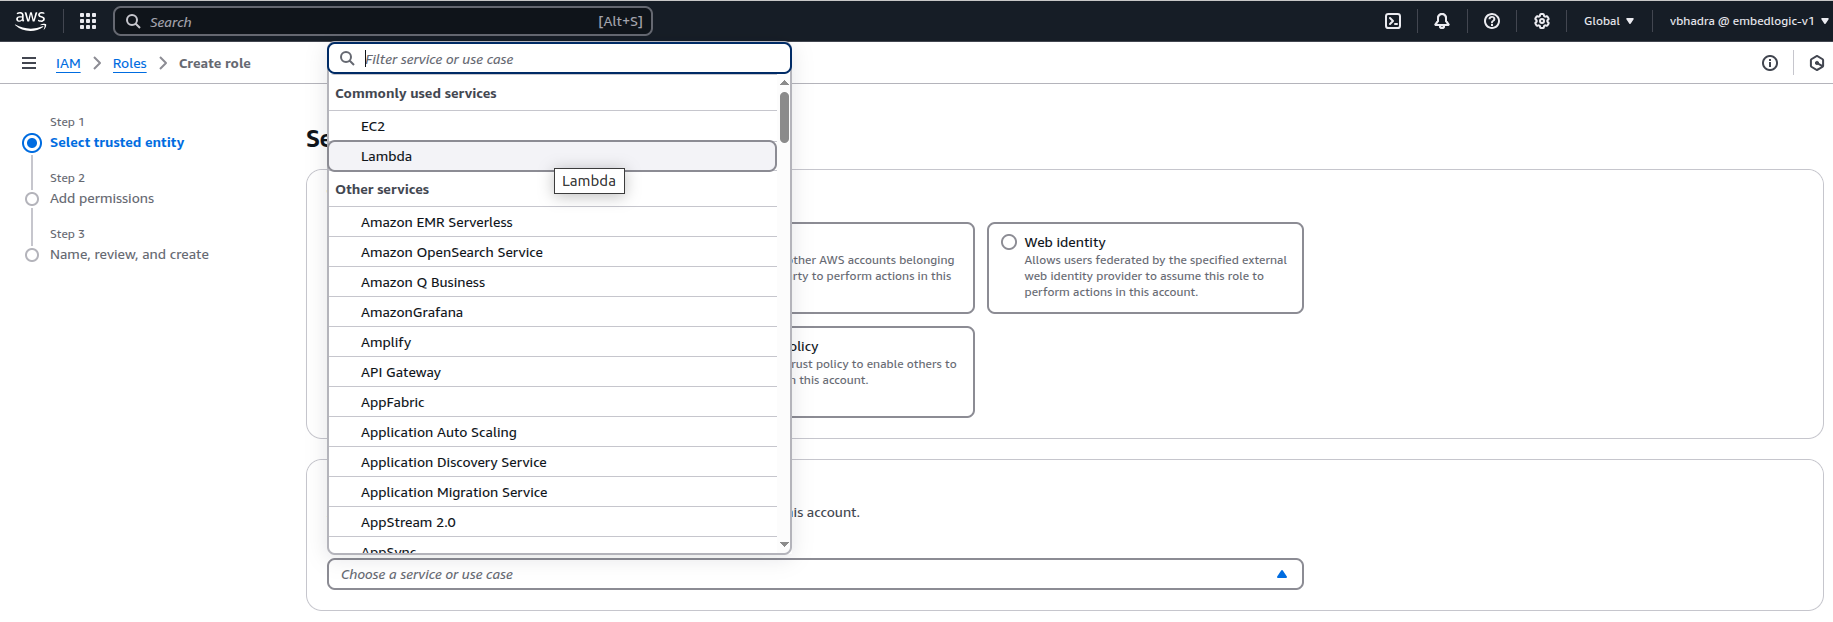

Add the following permissions to the role:
- AmazonDynamoDBFullAccess
- AmazonS3FullAccess
- AWSIoTFullAccess
- AWSLambdaBasicExecutionRole
- CloudWatchLogsFullAccess

Name the role as: Lambda_GPS_ProcessingRole.
Click on Create Role.
After this point you should see the following message on the console:
Role Lambda_GPS_ProcessingRole created.
Configure AWS IoT Rule to Trigger Lambda
The role is now set up. The next logical step is to configure AWS IoT Core. This configuration will ensure that incoming GPS data published to MQTT topics triggers the ProcessGPSData Lambda function.
Create an IoT Rule to Trigger Lambda
Type IoT in the Services search box:
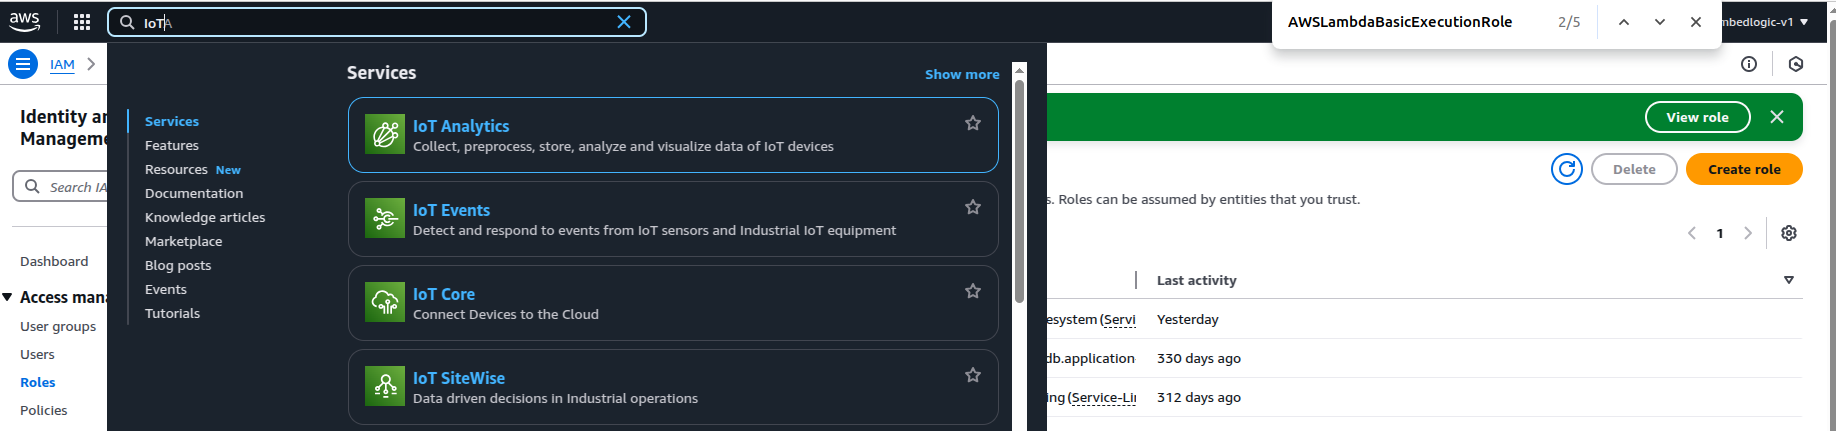
You should see IoTCore, click on it to select.
We will first try the MQTT Test Client. We will also try invoking a Lambda function. This is to determine if the Test Client publishes dummy GPS data into this topic. We will check if the Lambda function gets invoked.
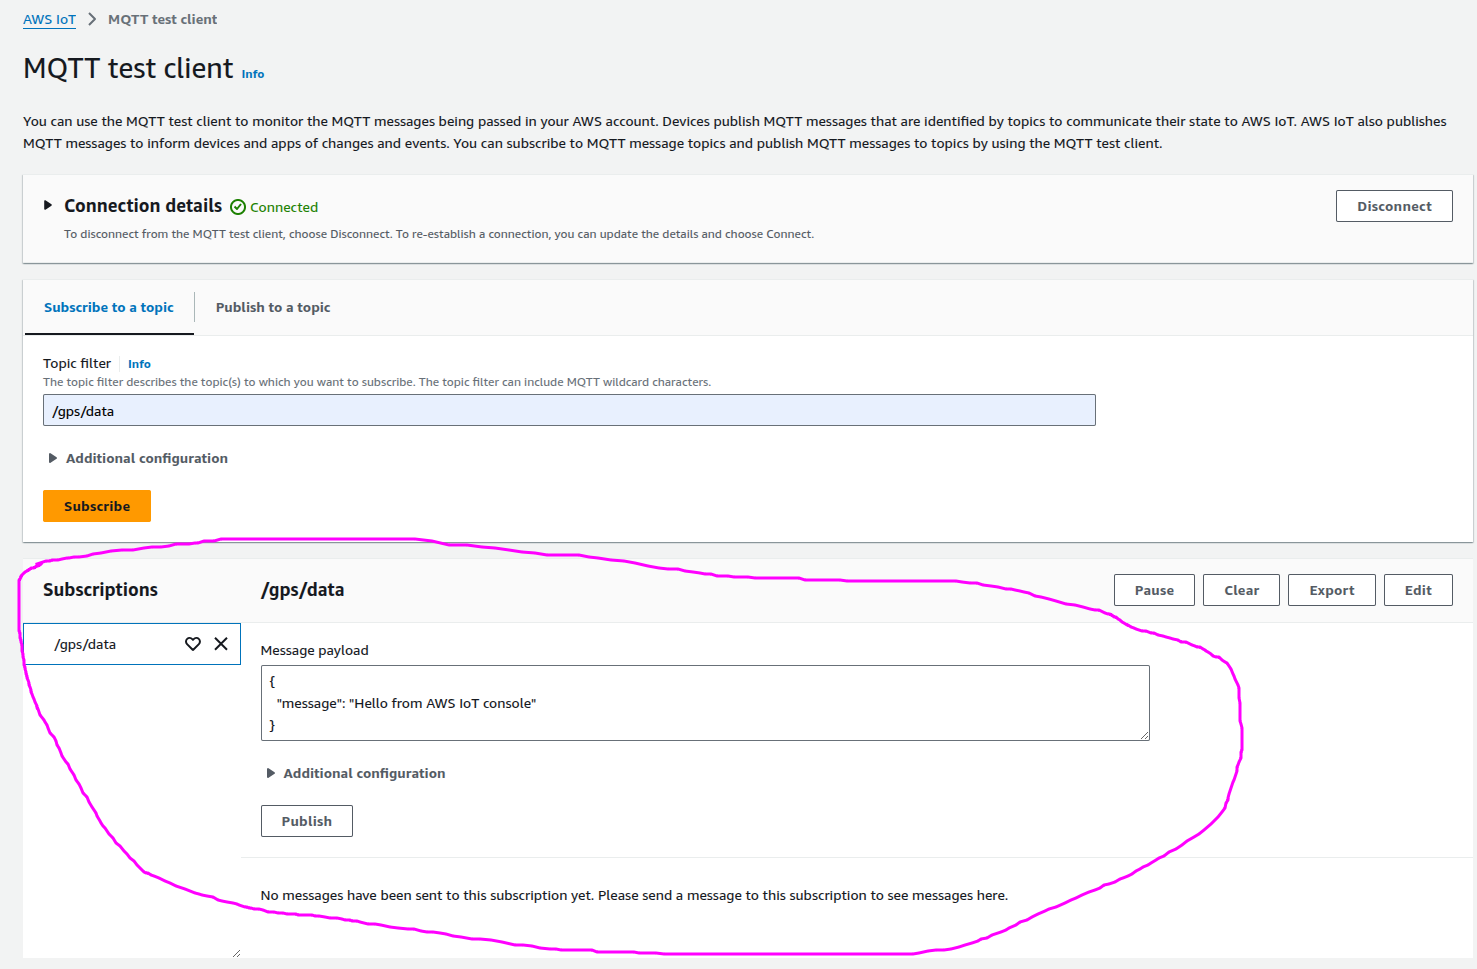
Click on the MQTT Test Client on the left hand side Pane. On the right side under Topic Filter, type /gps/data as below:
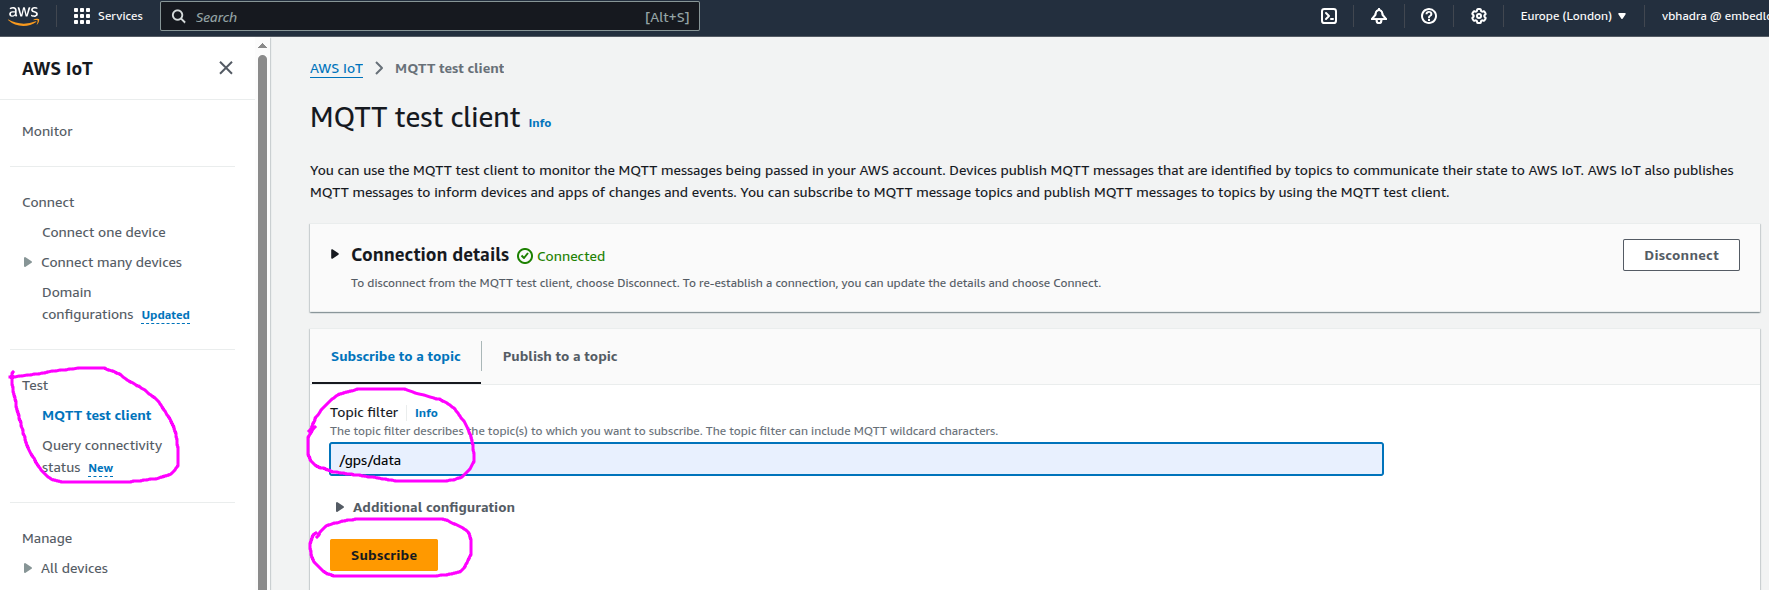
Click on Subscribe.
Now at the bottom you should see the subscription details as below:
We need to modify the test message a little bit before we publish.
Publish Custom Message
Now, click on the Publish to Topic Tab as below:
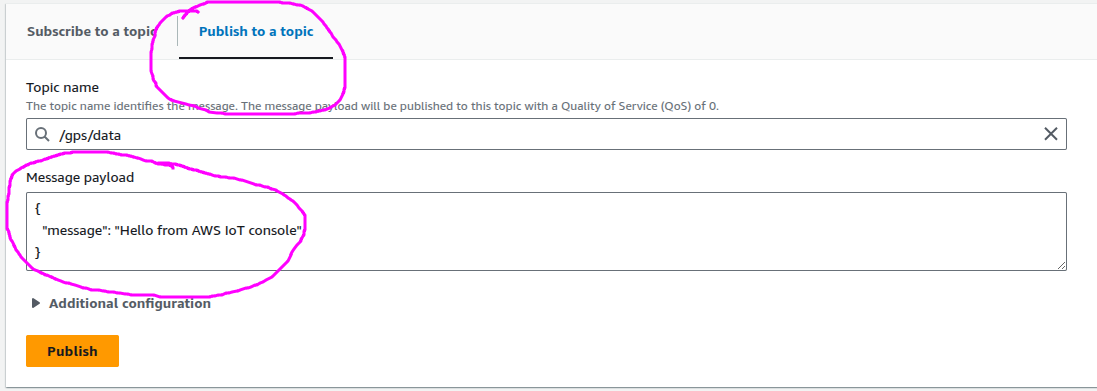
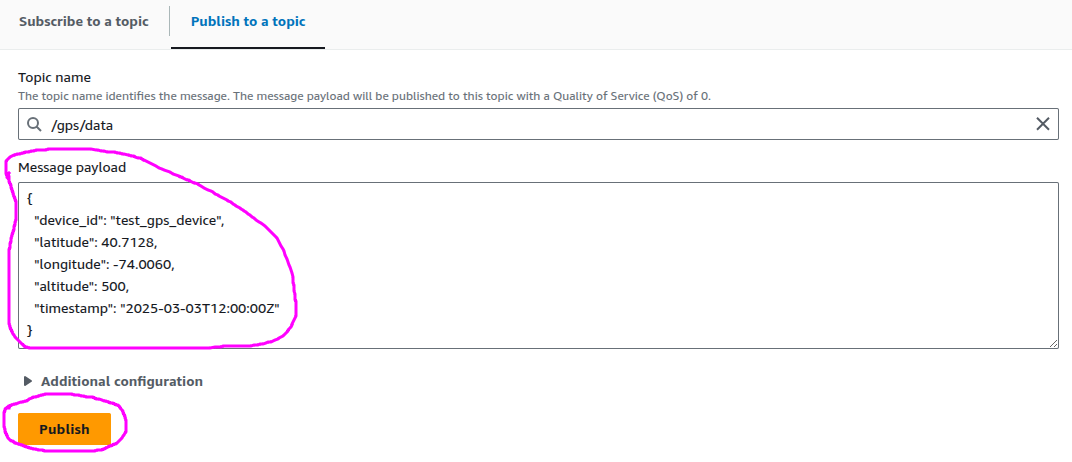
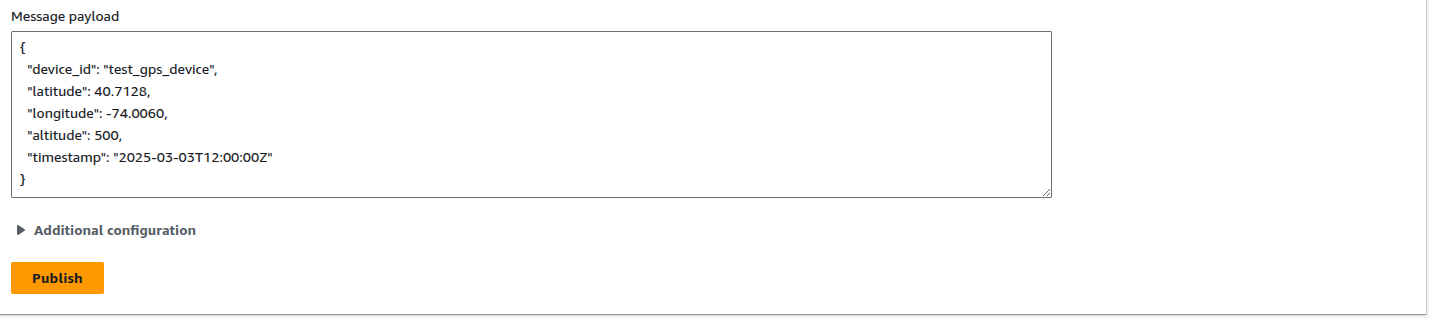
In the Message Payload copy and paste the following:
{
"device_id": "test_gps_device",
"latitude": 40.7128,
"longitude": -74.0060,
"altitude": 500,
"timestamp": "2025-03-03T12:00:00Z"
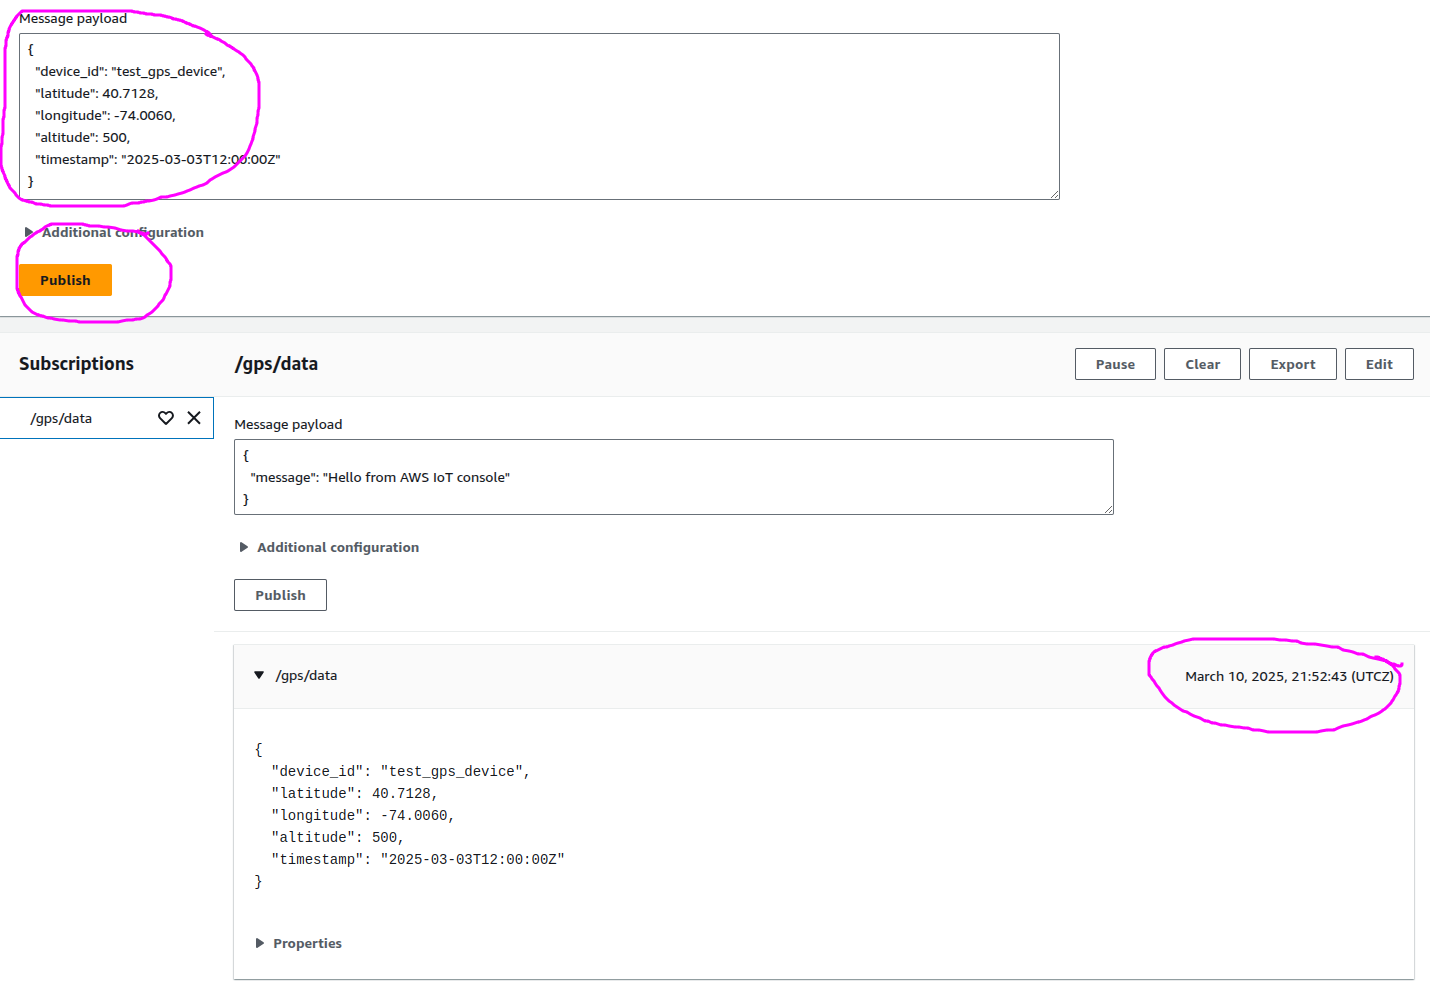
}Now click on Publish.
As soon as you click on Publish, notice the above message should appear at the bottom of the screen like this:
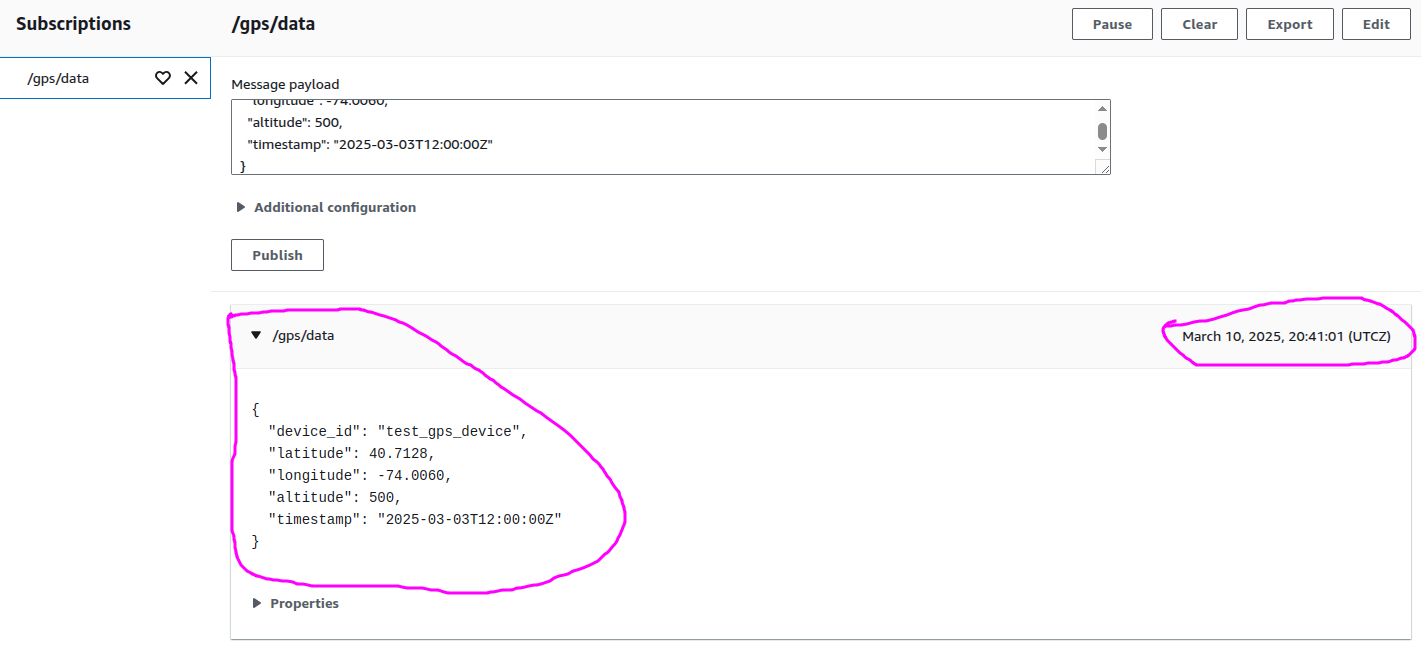
Notice the time of the message, it should match with your Publish time.
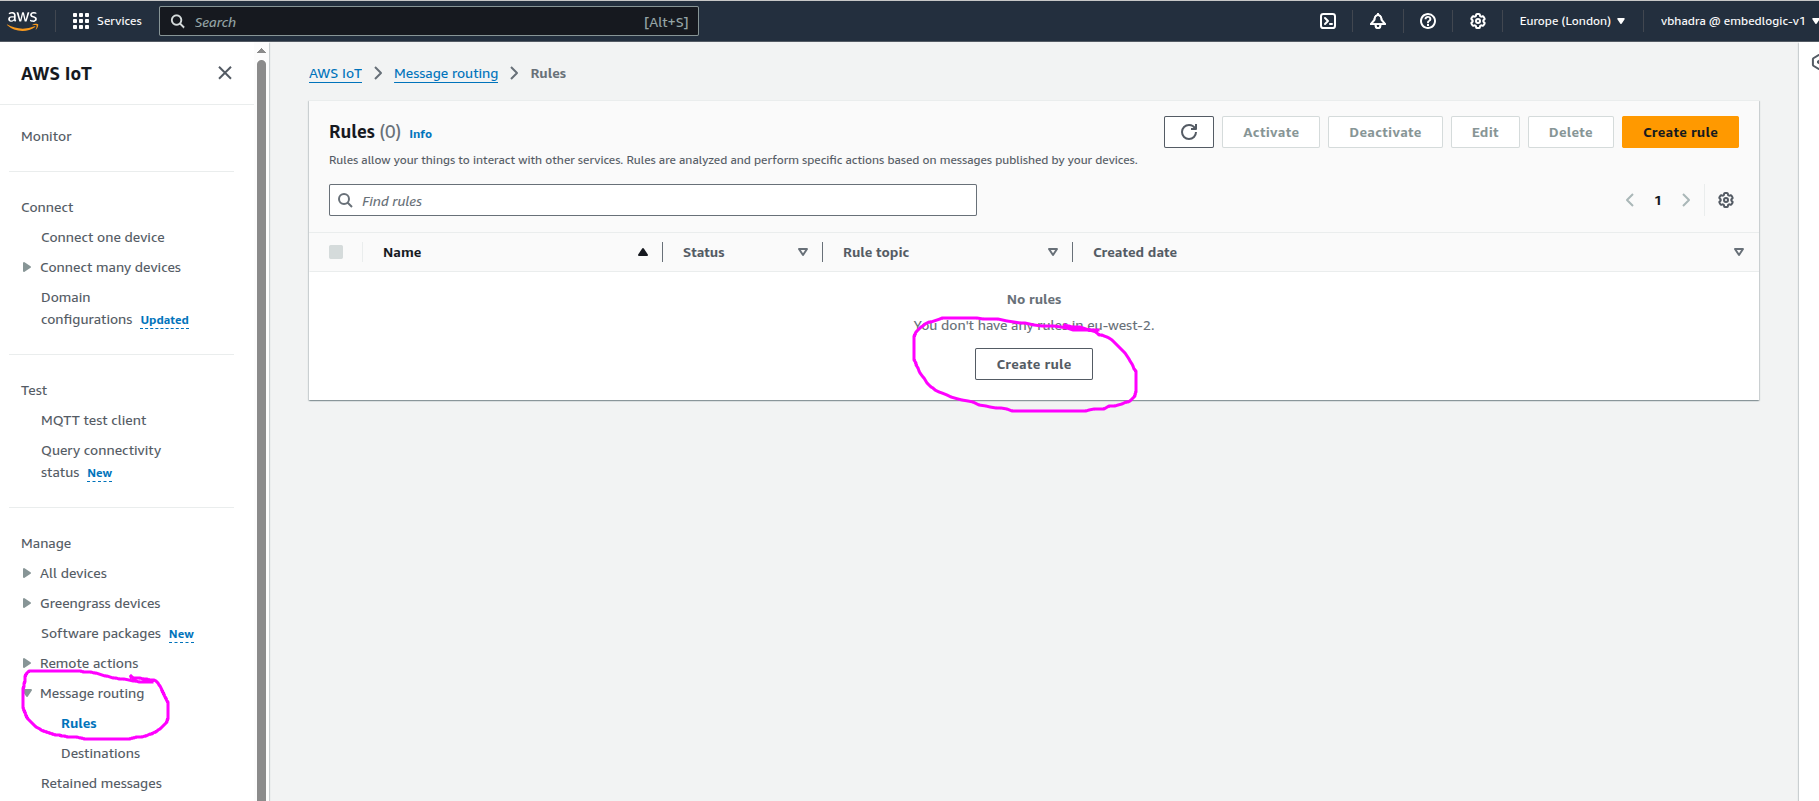
Create an AWS IoT Rule to Trigger the Lambda Function
Now that you can successfully publish and subscribe to the /gps/data topic, you should set up an AWS IoT Rule. This is the next step. This rule listens for messages published to /gps/data. It also triggers the ProcessGPSData Lambda function.
Click on Message Routing and then Rule:
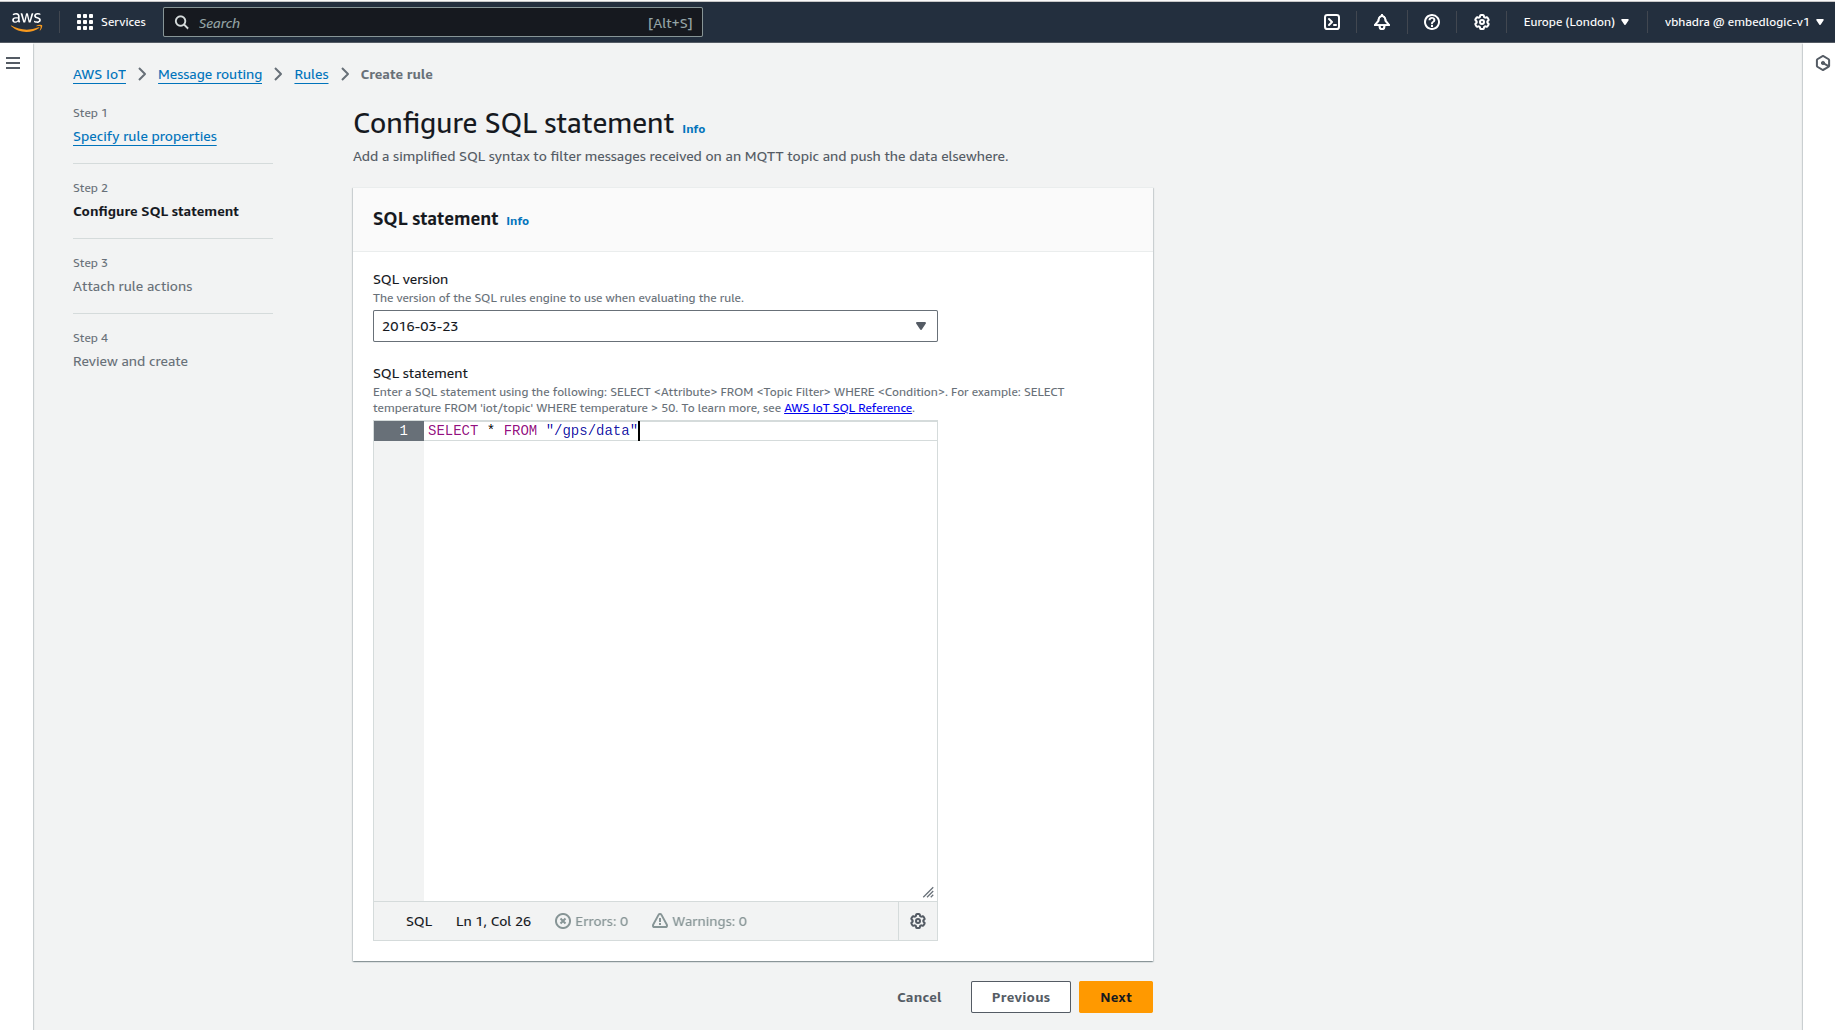
Click on Create Rule. Type GPS_Data_Processing_Rule as the rule name. Click Next and the type the following as the SQL Query statement:
SELECT * FROM "/gps/data"You should a screen similar to the below screen.
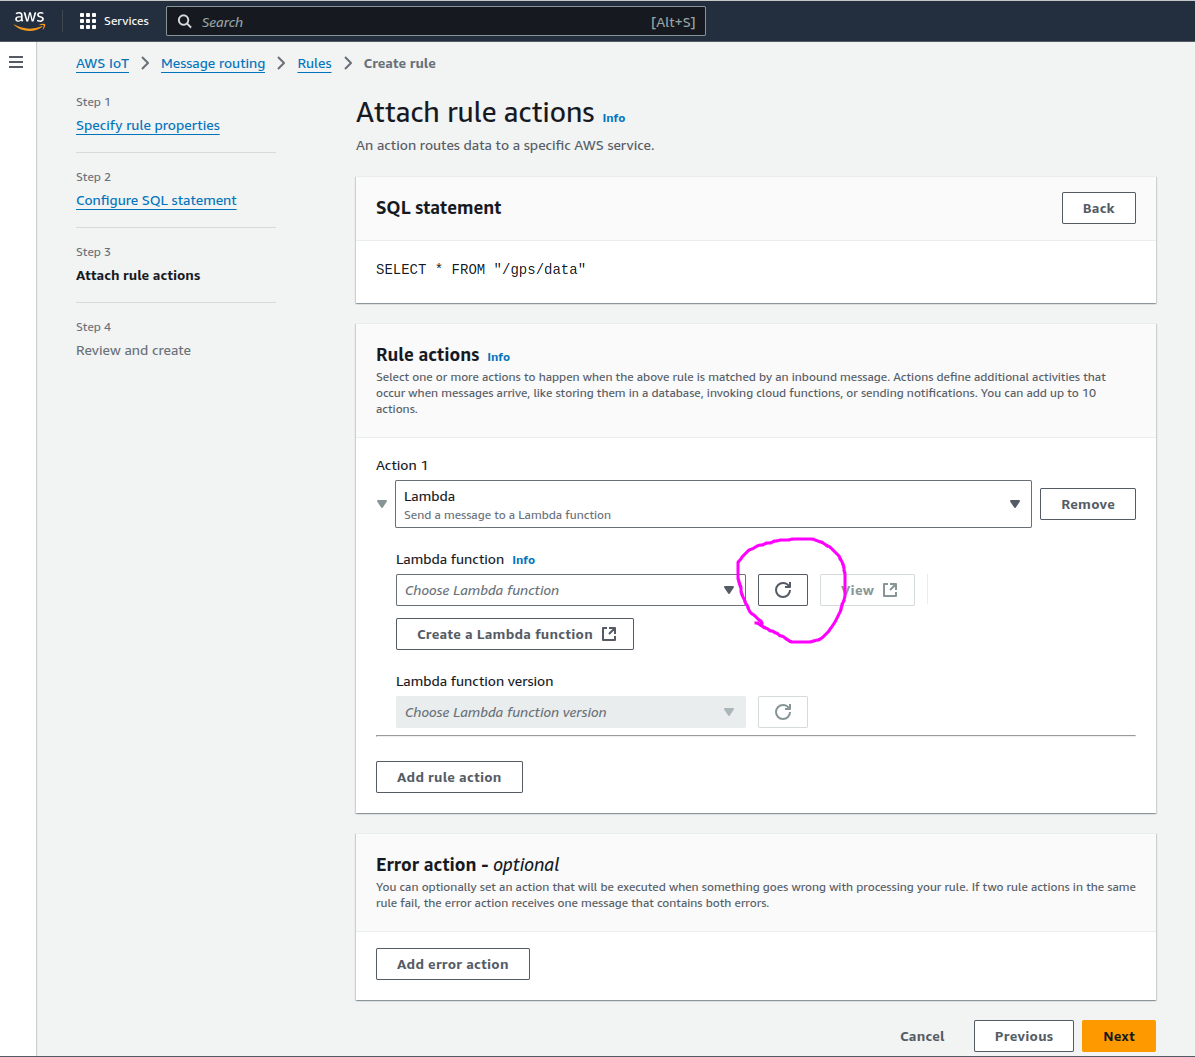
Click Next. In the next screen type Lambda in the Action 1 search box and select Lambda as below:
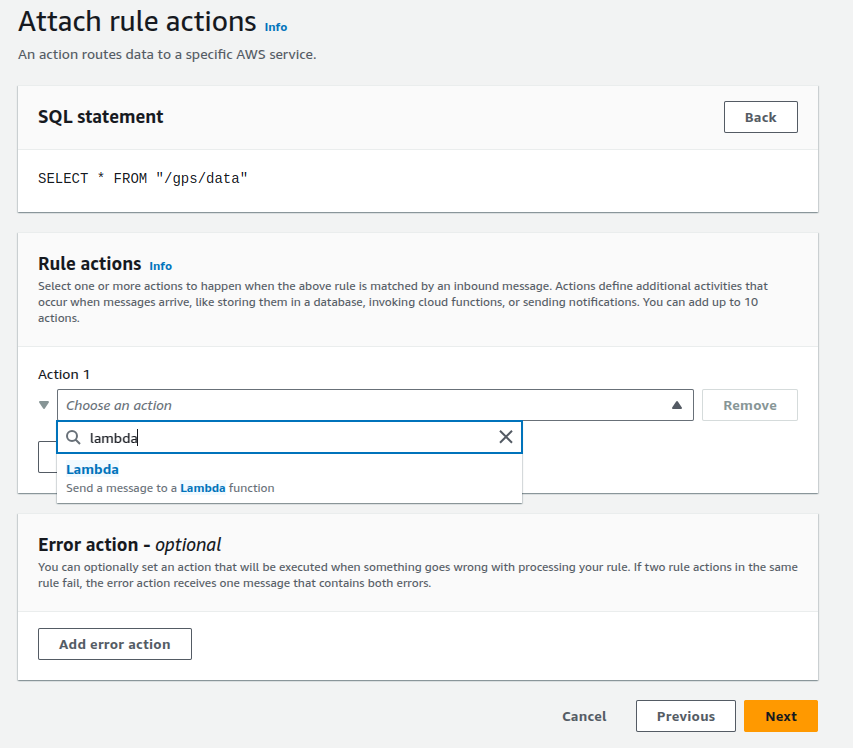
Once you select Lambda, it will ask you to specify which Lambda function you would like to invoke as below:

As we do not have any Lambda function we need to write one. Click on Create a Lambda Function and it will take you to Lambda function creation page. Select the following:
- Select “Author from scratch”.
- Function Name:
ProcessGPSData - Runtime:
Python 3.13 - Choose “Use an existing role”.
- Select the IAM Role you previously created (
Lambda_GPS_Processing_Role).
- Select the IAM Role you previously created (

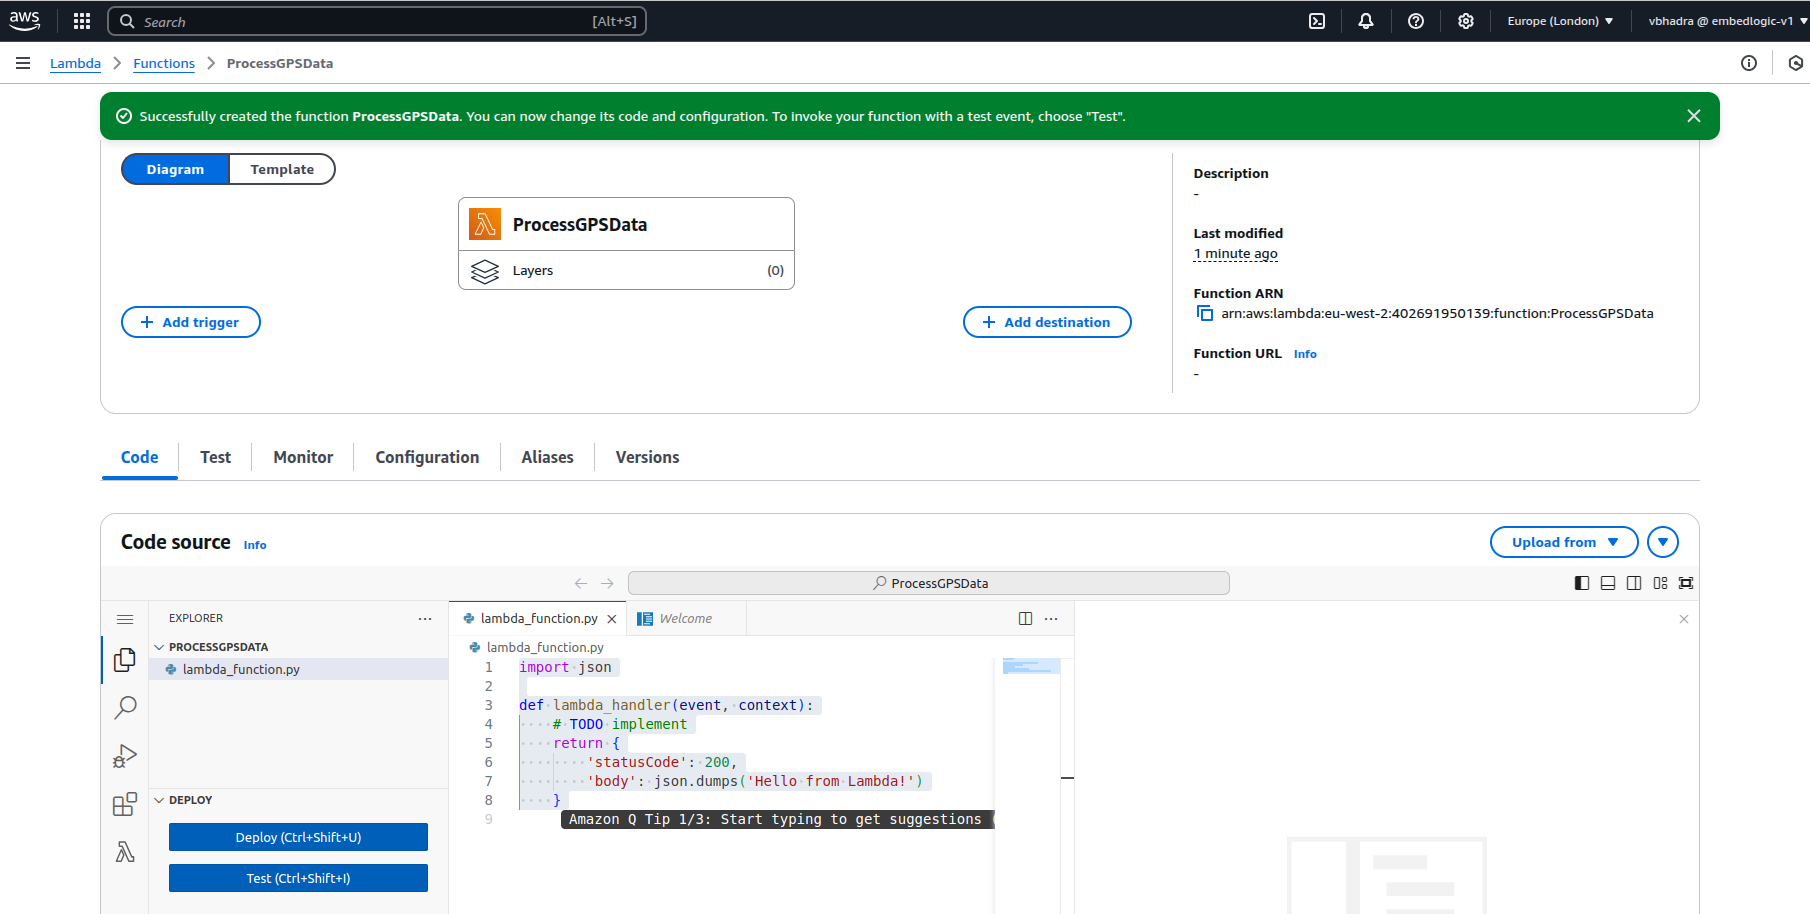
Click on Create Function and you should be able to see the below screen or similar:
Now this Lambda function should appear on the Message Routing Rule Page:
Refresh the Lambda Function List and select the newly created Lambda function:
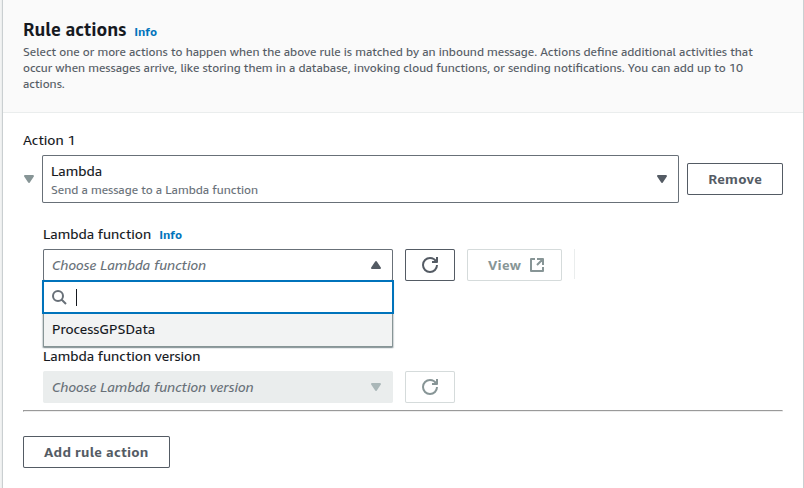
Select the Lambda Function ProcessGPSData from the list. Click On Next and then Create.
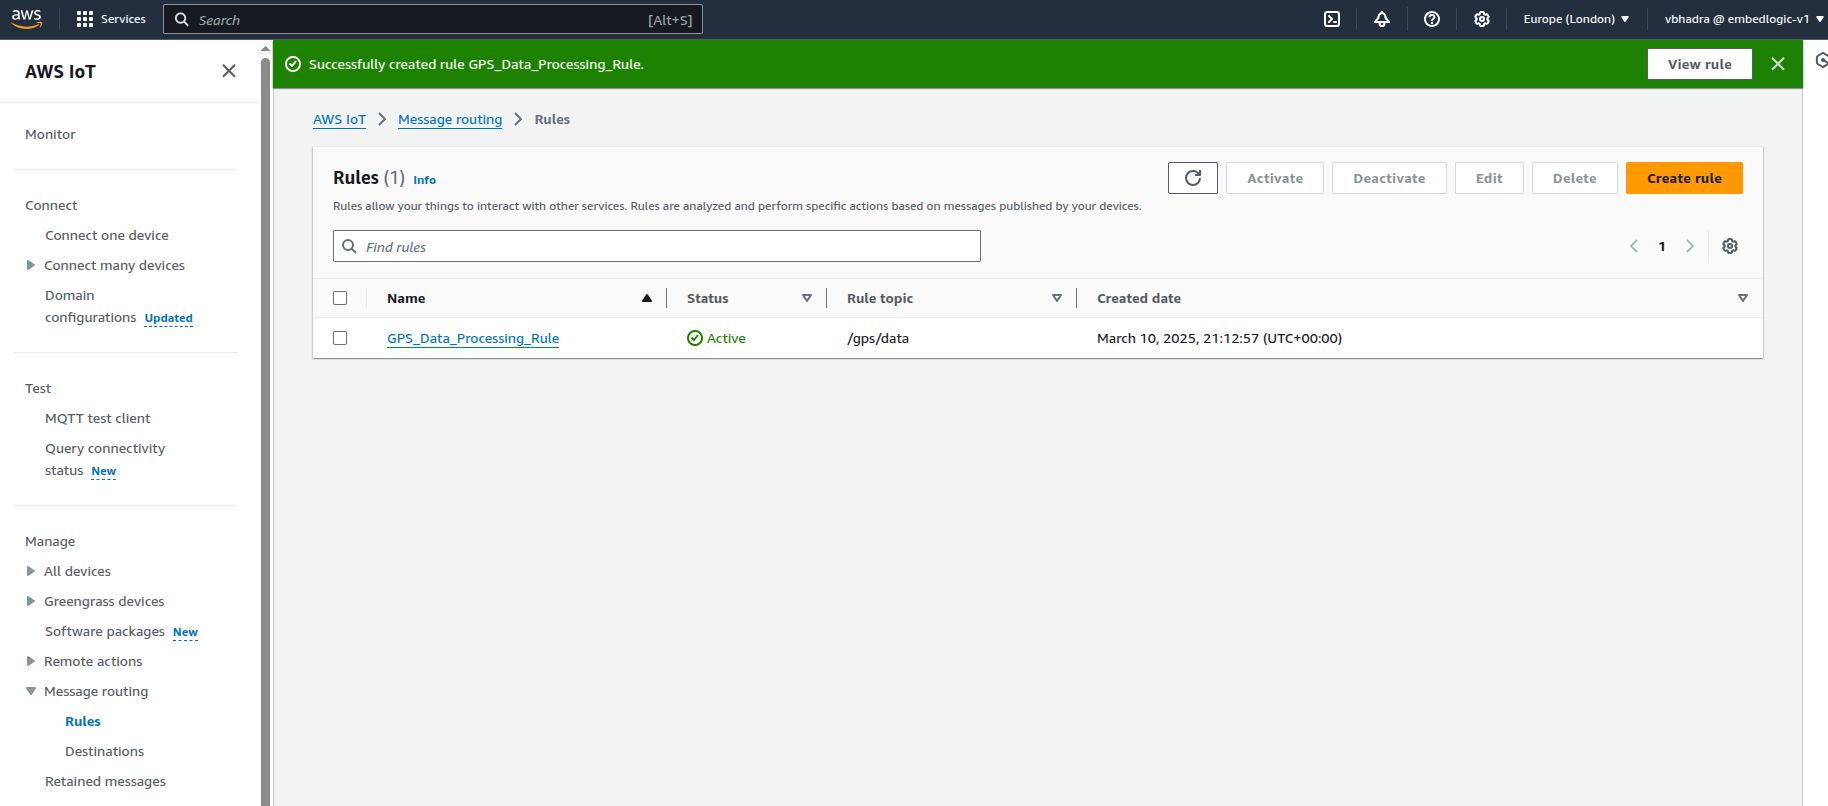
And you should something like this on the screen:
The purpose of this lambda function is to insert the message published in the topic. It then stores the message into a DynamoDB table. The current Lambda Function body won’t do anything useful. So we need to modify that. But before that we need to create a DynamoDB table.
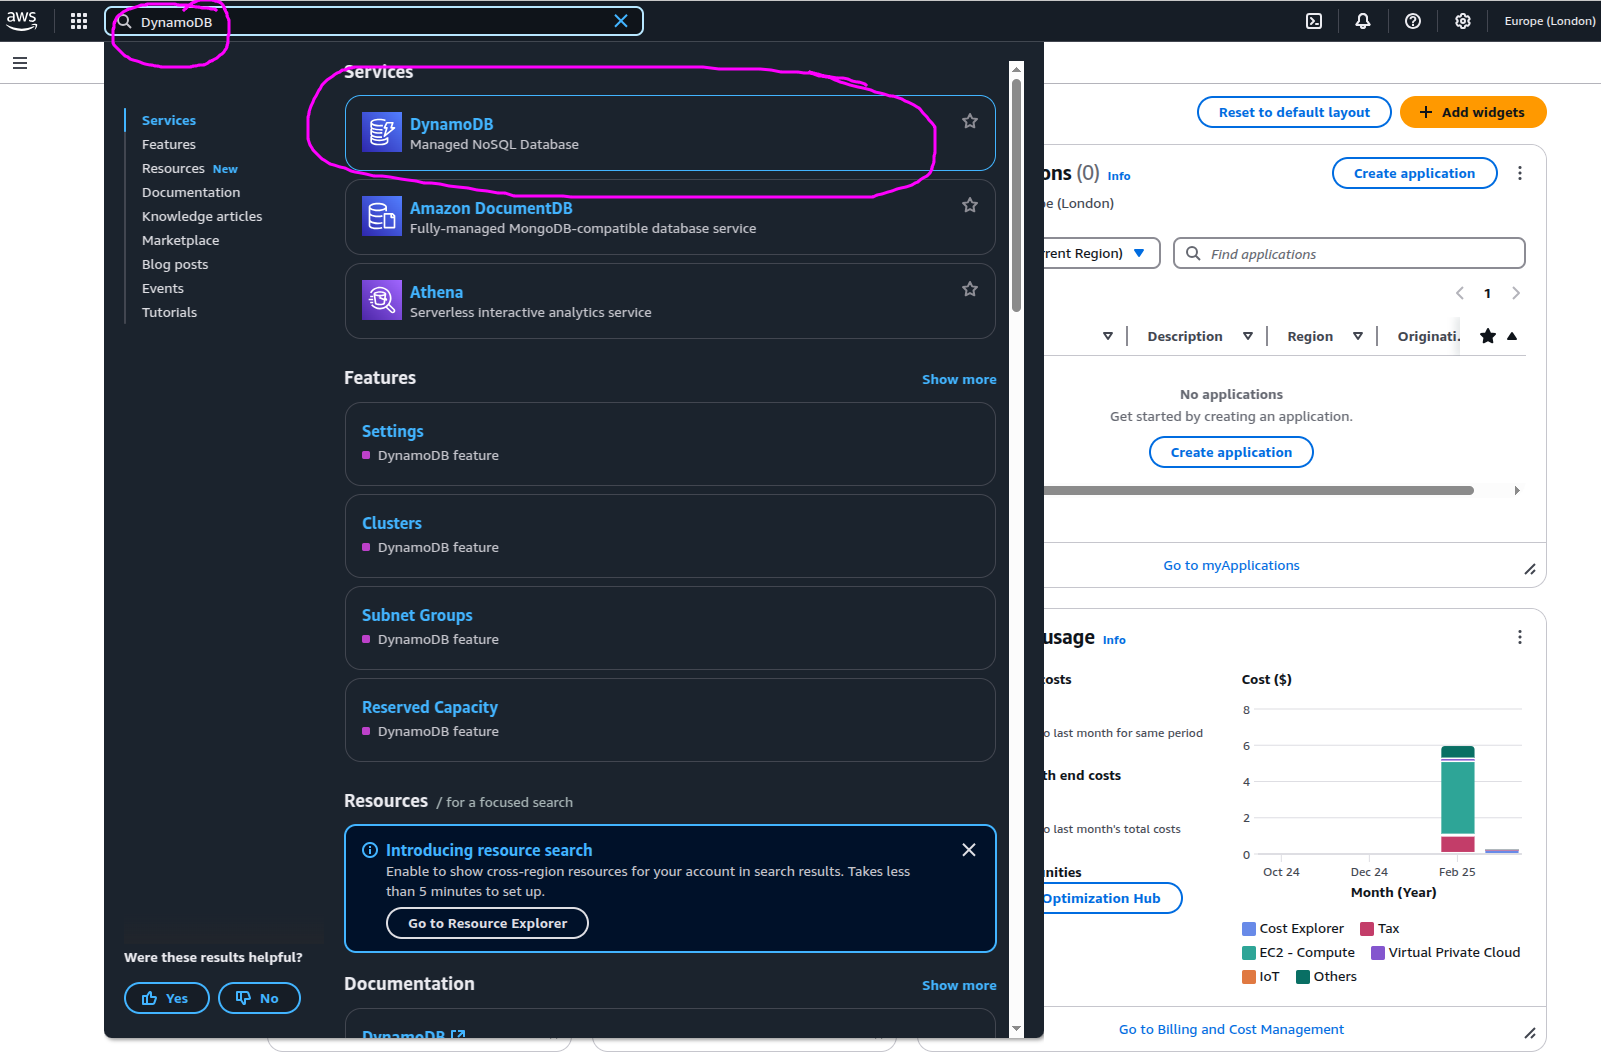
Creating DynamoDB Table for GPS Data
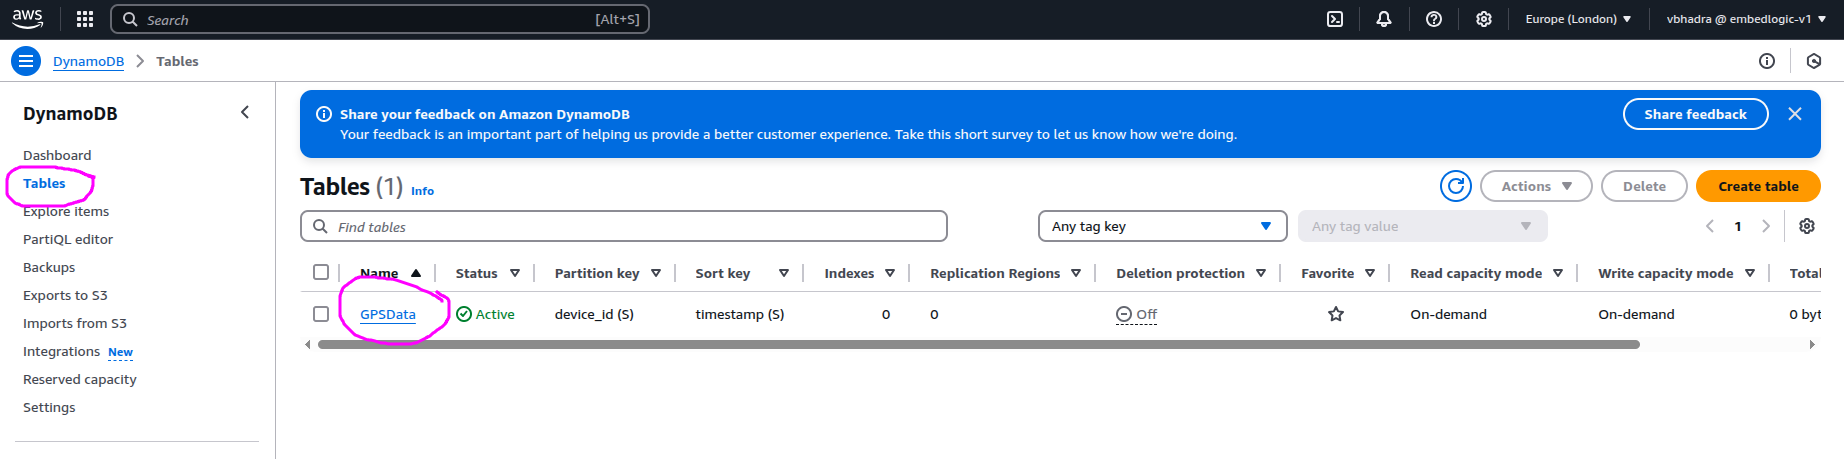
Type DynamoDB on the Services search box and select DynamoDB:
On the left hand pane select Tables and click on Create Table:
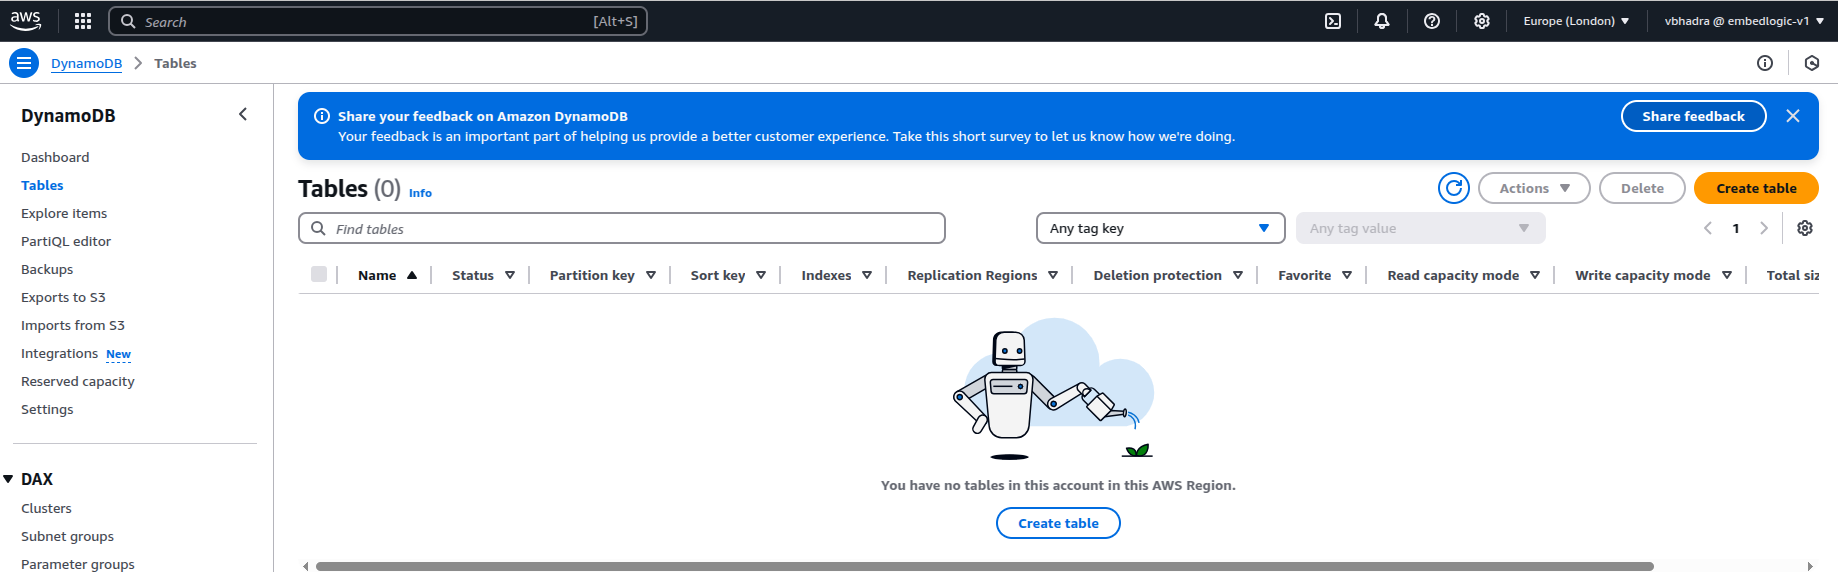
Once you click on Create Table you will see a screen somewhat similar to the below:
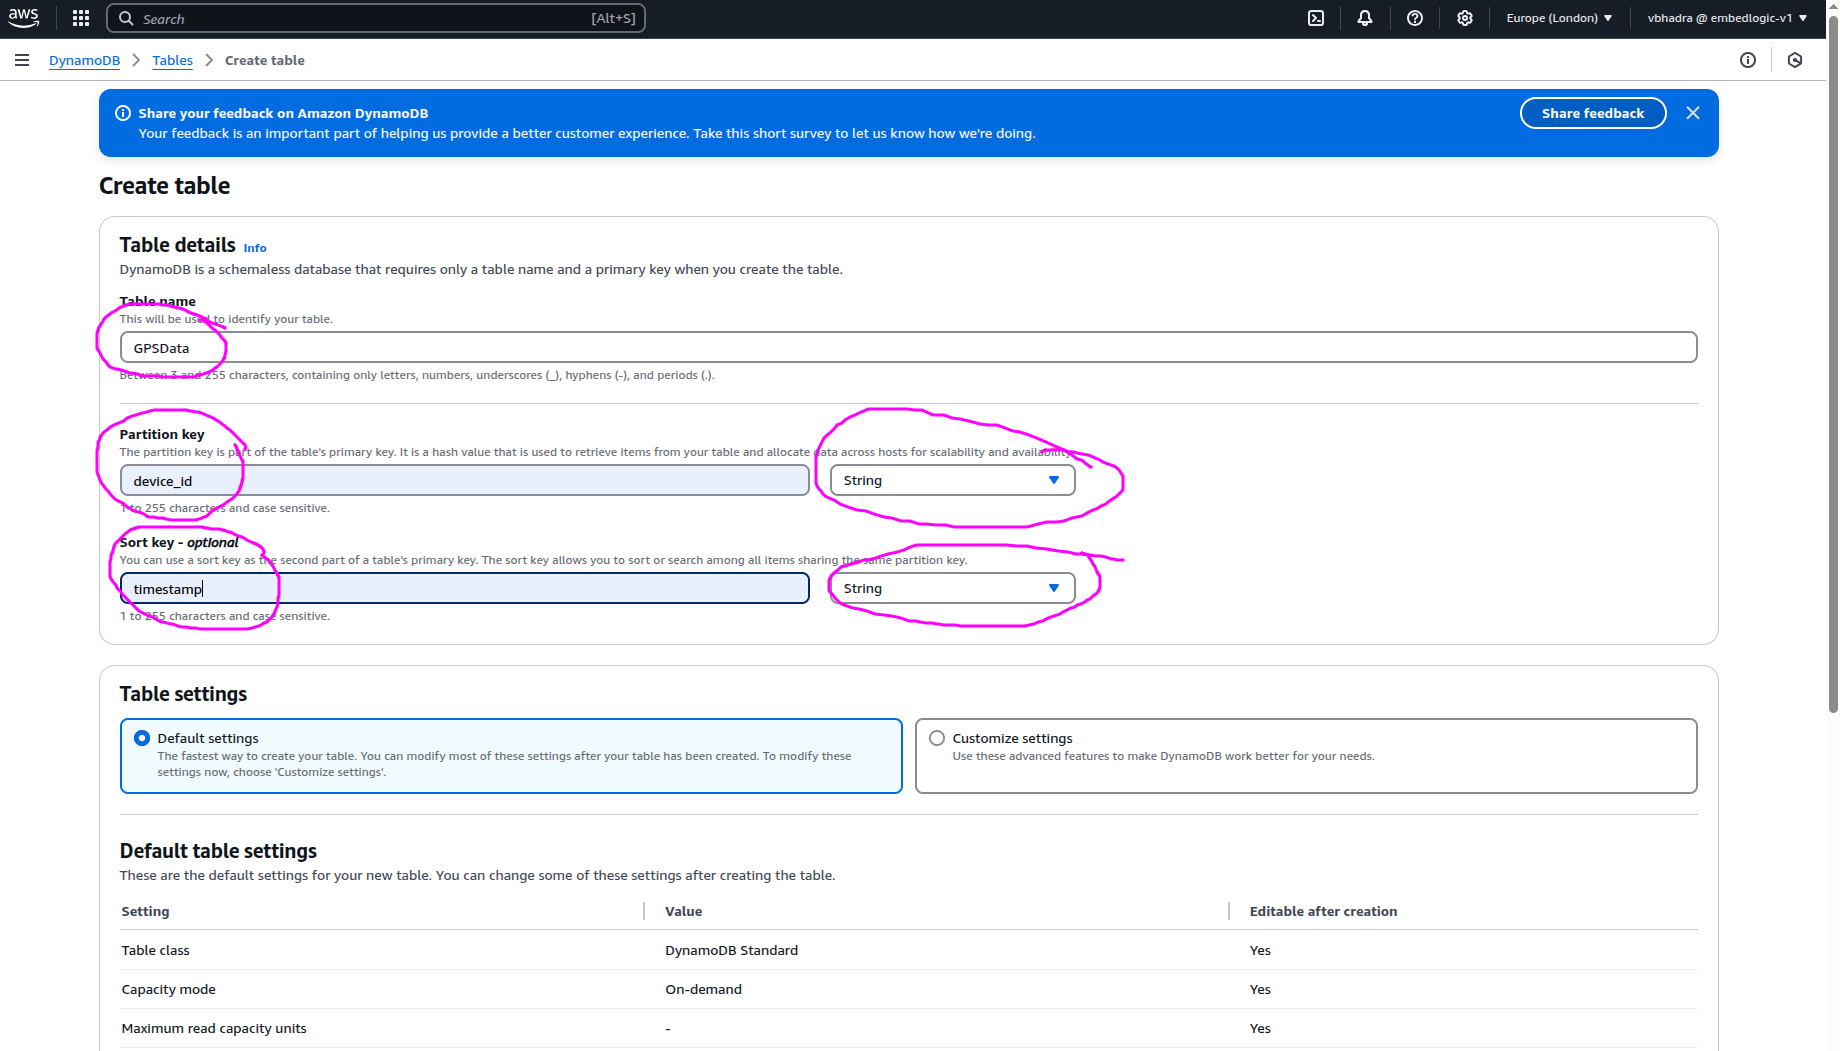
Fill up the following fields:
- Table Name:
GPSData - Partition key:
device_id→ type String - Sort key:
timestamp→ type String
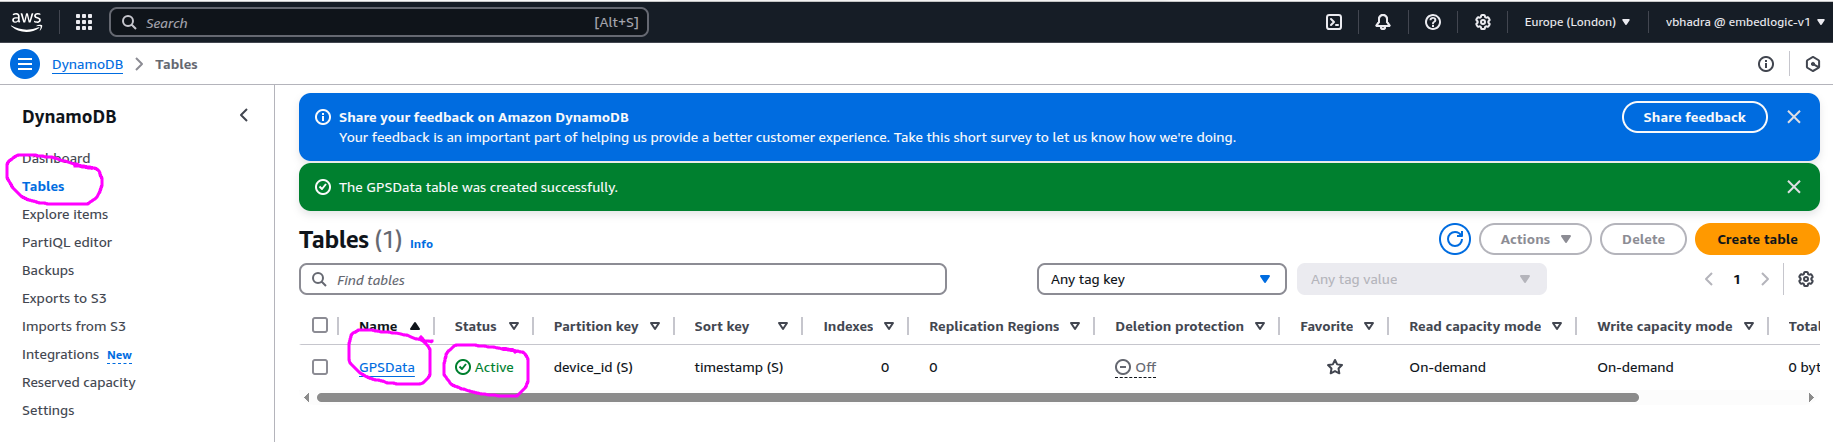
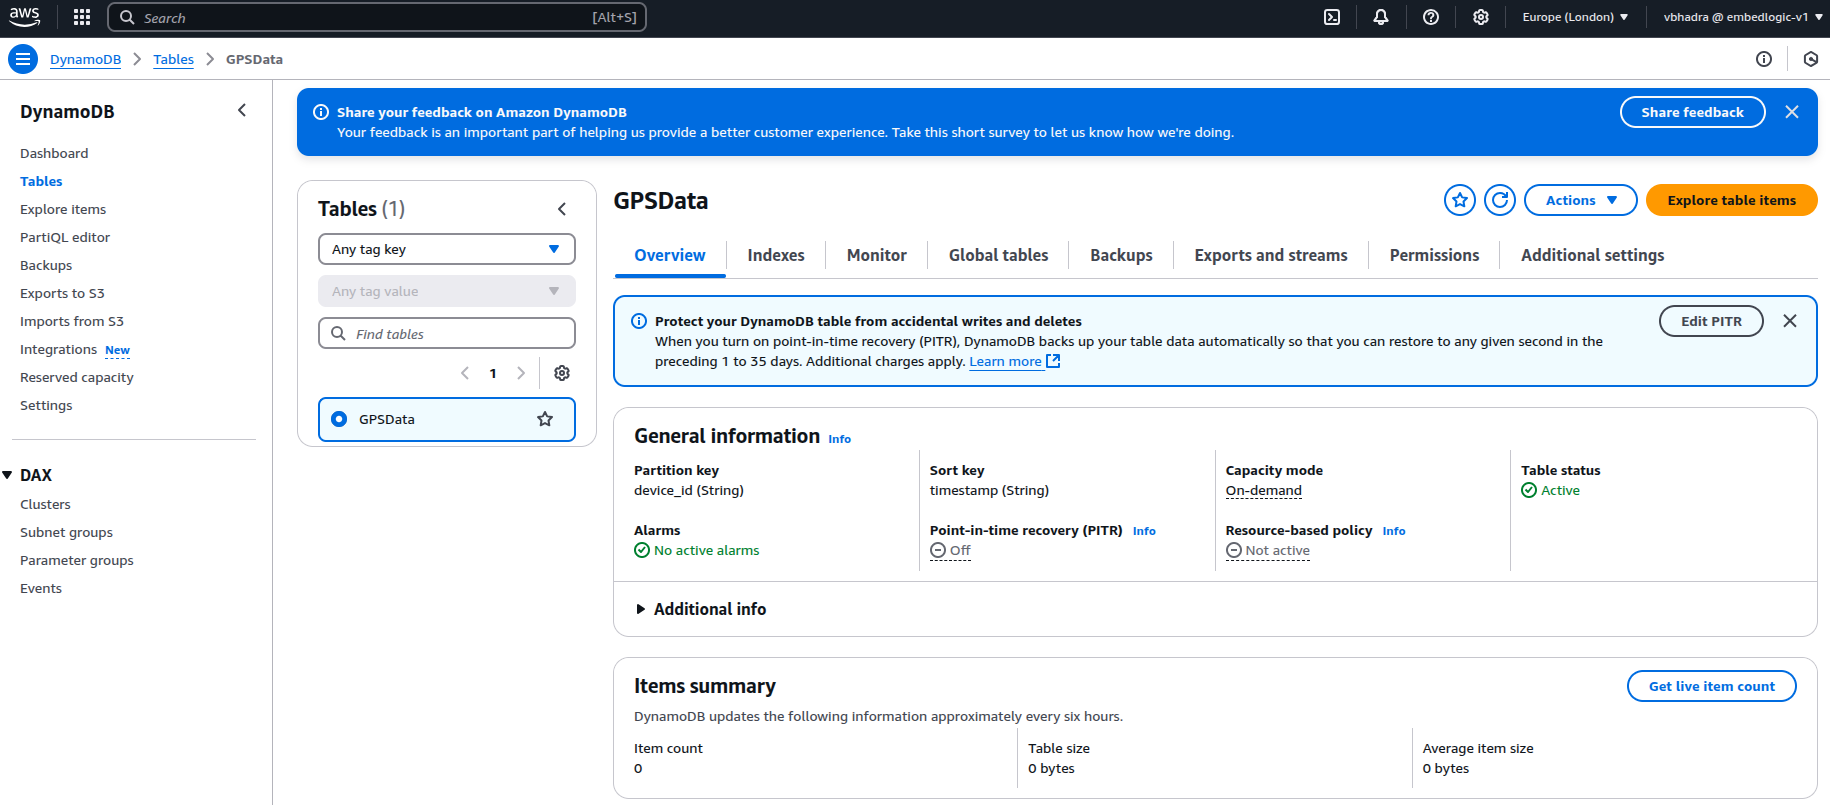
Leave rest as default and then click on Create table. It take a while before the table creation is completed. Once created it should looks like the below:
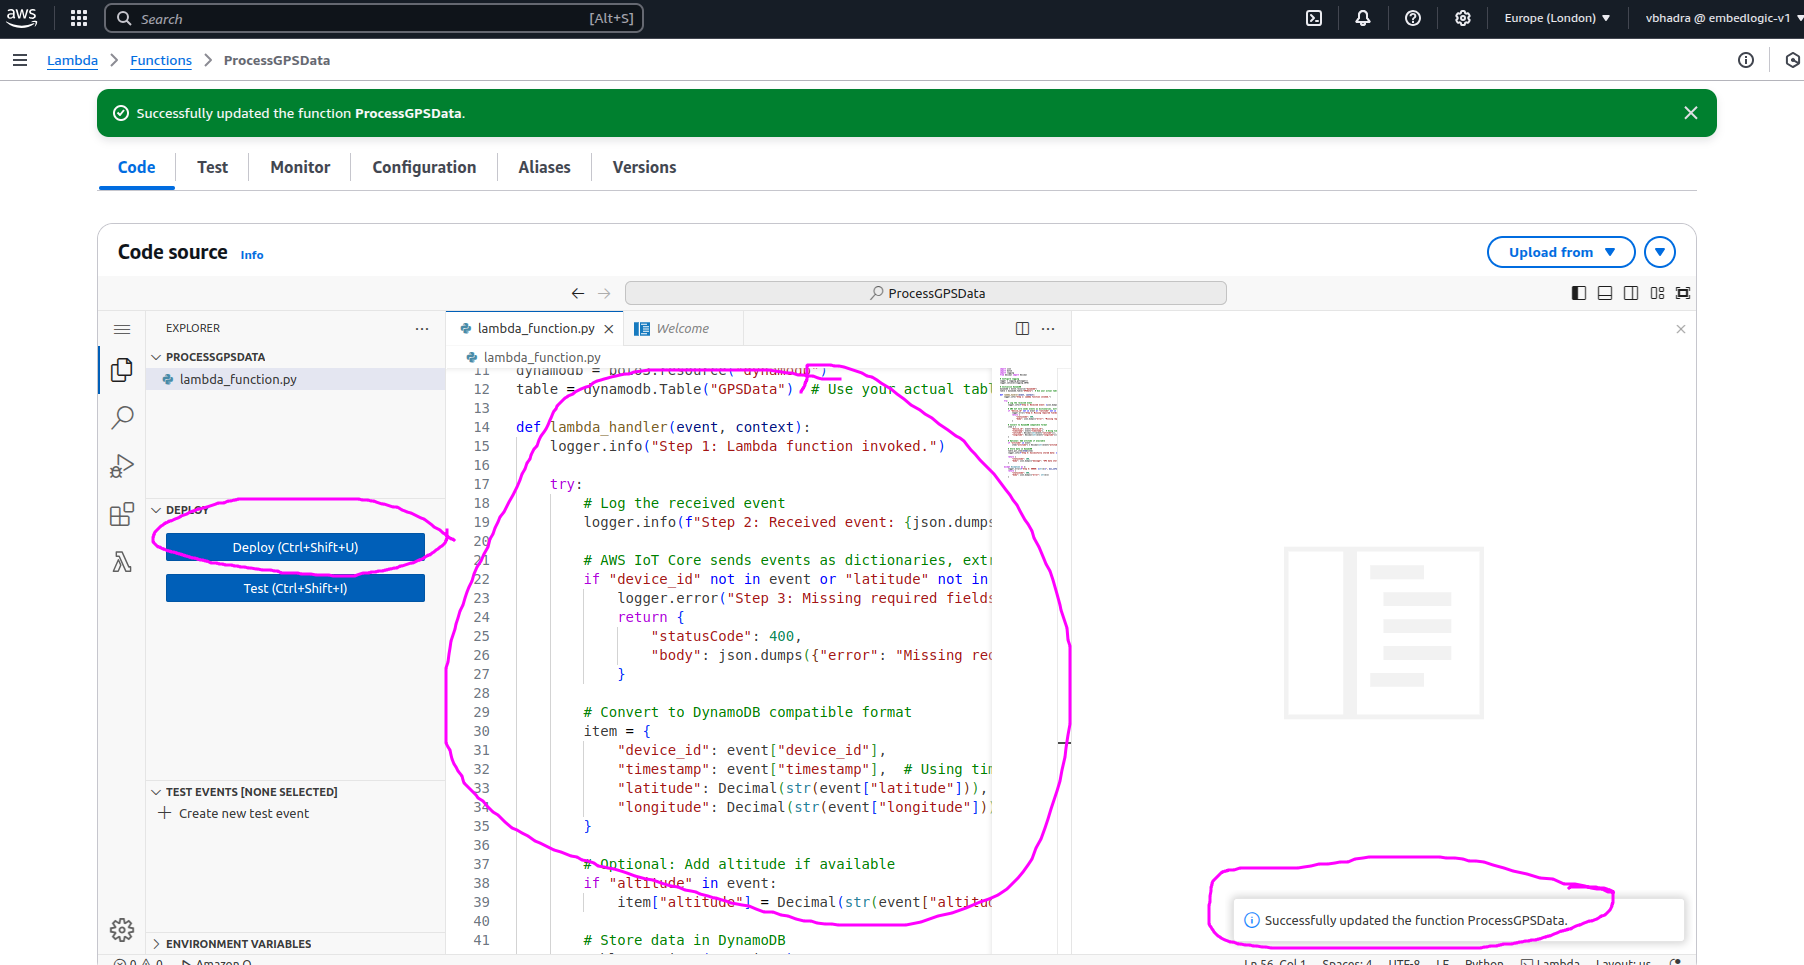
Now our table is ready and we can write our Lambda body. Go back to the Lambda Function ProcessGPSData and modify the function body with the below:
import json
import boto3
import datetime
from decimal import Decimal

# Initialize DynamoDB resource
dynamodb = boto3.resource("dynamodb")
table = dynamodb.Table("GPSData")

def lambda_handler(event, context):
    try:
        print("Step 1: Received event:", json.dumps(event, indent=2))

        # Check if the event comes from SNS or is a direct JSON payload
        if "Records" in event:
            # Handle SNS event
            gps_data = json.loads(event["Records"][0]["Sns"]["Message"])
        else:
            # Handle Direct IoT JSON event
            gps_data = event

        # Prepare item for DynamoDB
        item = {
            "device_id": gps_data["device_id"],
            "timestamp": str(datetime.datetime.utcnow()),  # Store UTC timestamp
            "latitude": Decimal(str(gps_data["latitude"])),  # Convert to Decimal
            "longitude": Decimal(str(gps_data["longitude"])),
            "altitude": Decimal(str(gps_data["altitude"]))
        }

        # Store data in DynamoDB
        table.put_item(Item=item)

        # Fix: Use `default=str` to serialize Decimal values correctly
        return {
            "statusCode": 200,
            "body": json.dumps({"message": "GPS data stored successfully!", "data": item}, default=str)
        }

    except Exception as e:
        print(f"Step 5: ERROR: {str(e)}")
        return {
            "statusCode": 500,
            "body": json.dumps({"error": str(e)})
        }
Now we are ready to deploy our Lambda function, click on Deploy and you should be able to see the Lamnda function been successfully deployed:
Test The Lambda Code
Now that we have the following:
- IoT topic to publish dummy GPS data in JSON format
- MQTT Message Routing Rule to invoke a Lambda function to push the data into a DynamoDB table.
- A DynamoDB Table to hold the inserted data.
Now lets try putting these things together to achieve the first logical step in the project.
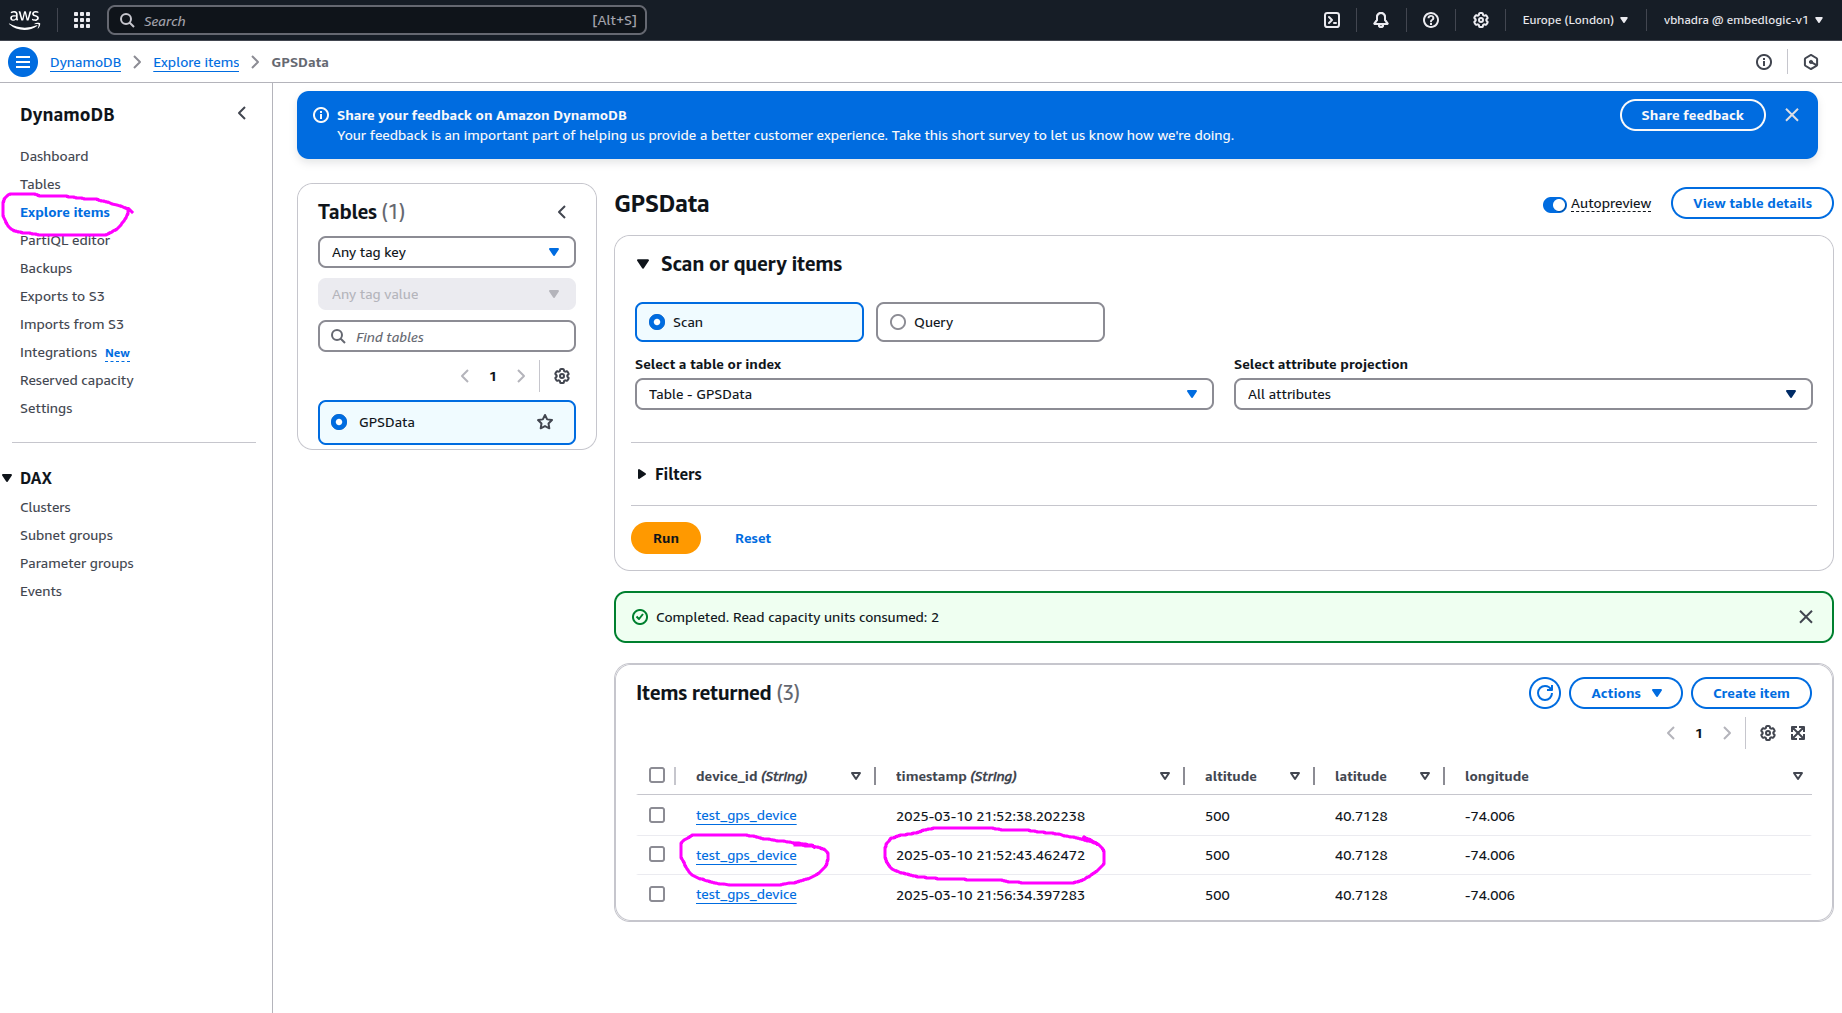
Publish a dummy message as below:
Note the timestamp of the published message.
Go to the DynamoDb screen and click on Tables:
Click on the table name GPSData and you should see the following on the screen:
On the left hand pane click on Explore Items and you should be able to see the new items in the table with the same timestamp:


Leave a Reply